If you are on holiday or you will be unavailable for a few days or a month, you can create an auto email responder for your emails. When people email you, they will receive an automated email with your message.
1. Log in to your cPanel account.
2. In the Email section, click on Autoresponders. ![]()
3. From the Autoresponders page, click on Add Autoresponder.
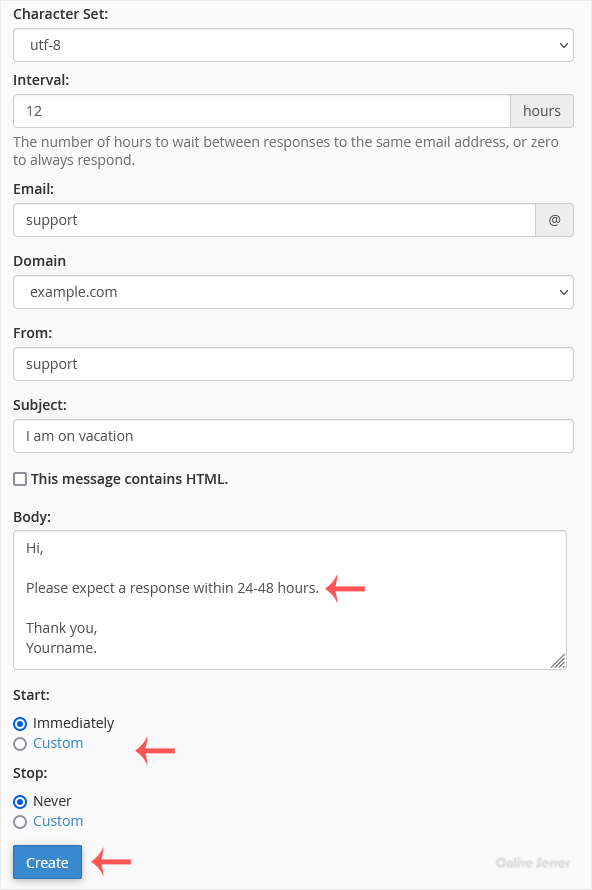
4. Enter the following details:
- Interval: Specify the number of hours you wish the autoresponder to wait between responses to the same email address.
- Email: Enter your email address on which you want to enable autoresponder. To enable auto responder on support@example.com, enter support in the email field.
- Domain: Select the appropriate domain from the drop-down list if you have multiple domains.
- From: Enter the name that the auto-response will be from.
- Subject: Please enter your email subject such as I am on vacation, etc.
- Body: This is the main content of your email, also known as the email body.
5. Select the start and stop time of your autoresponder.
6. Click on Create.
How to remove Autoresponder?
1. In the Email section, click on Autoresponders.
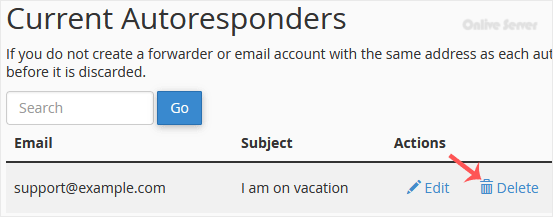
2. You should see your autoresponder email list under Current Autoresponders.
3. Click on Delete on the right sight of the email address.
4. Confirm with Delete Autoresponder.

