Make sure you have these before you start:-
- A VPS Plan with Enough Resources
- At least 8 GB of RAM.
- 80 GB or more of disk space.
- 4vCore or more
- Support for virtualization (KVM, Hyper-V, or something similar).
- A Real Windows 11 ISO File
- Get the official Windows 11 ISO from Microsoft’s website or download it here
- Get the virtio-win-0.1.240 ISO from the official website or click here.
- RDP or VNC Access
- Check that your VPS provider gives you RDP or VNC access to install.
- Windows Product Key
- You need a real product key to activate Windows 11 after you install it.
- You can use a trial version just to test it out.
- Admin Access to the VPS
- You need root or admin rights to install the operating system.
- In our case, we are going to guide you for virtualization.
Step-by-Step Guide to Installing Windows 11 on VPS
Step 1: Connect to Your VPS Control Panel, virtualization.
Step 2: Download the Windows 11 ISO
- Go to the “ISO Management” or “Operating System” part in your VPS control panel.
- Get the Windows 11 and virtio-win ISO files from the links provided.
- Set up a new VPS by filling in the needed info and giving it RAM, core, disk, and IP.
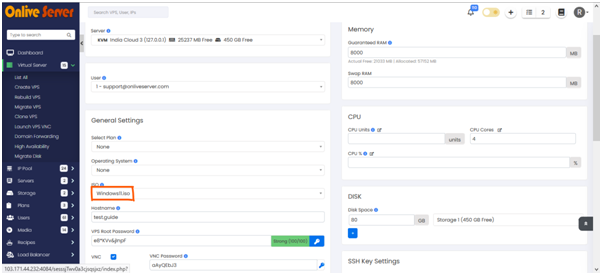
- Connect the ISO to your VPS by picking it as the ISO option and follow the key steps shown in the picture below.
- Open up the Advanced options.
- CPU mode – Host Passthrough
- BIOS UEFI(OVMF) and make sure TPM is checked
- Pick the secondary ISO virtio-win and change the boot order as shown in the image.
- Hit create


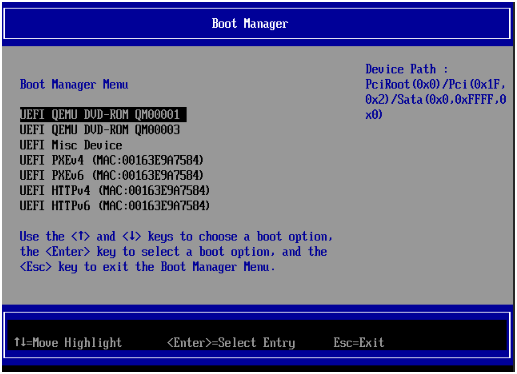
Step 3 :Launch the VNC console after creation is done.
- Do what the pop-ups tell you and enter the boot manager.
- Choose DVD-ROM1 and press Enter.
Step 4: Perform the installation after graphical interface appears
- The Windows 11 installation wizard appears when the VPS starts from the ISO.
- Pick your language, time format, and keyboard layout. Then hit “Next”.
- Click “Install Now.”
- Type in your Windows product key or select “I don’t have a product key” to activate later.
- Choose which edition of Windows 11 you want to install (Home Pro).
Step 5: Configure Disk and Partition
- Select “Custom: Install Windows only (advanced).
- Pick the virtio-win you prefer (E:/amd64/win11).
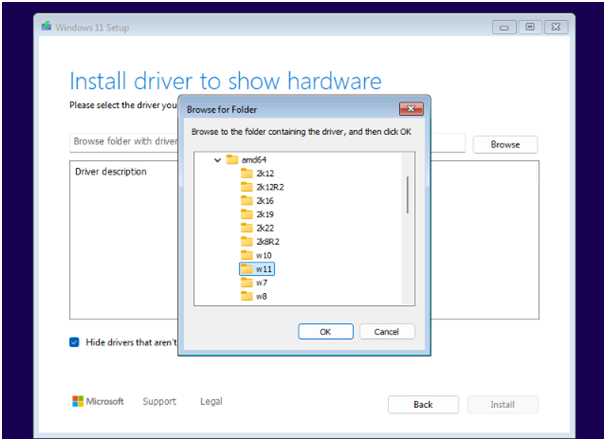
- Pick the virtual hard drive of your VPS to install Windows 11. If you can’t see any partitions opt for a full disk installation.
- Click “Next” to confirm and move forward.
Step 6: Finish the Installation
- Windows 11 will copy files and set up the operating system.
- This might take between 10 to 30 minutes, based on how well your VPS performs.
- The VPS will restart on its own once the installation ends.
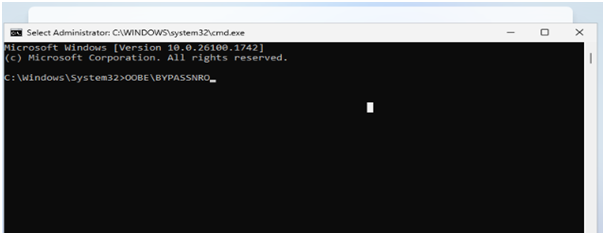
Step 7: You might run into some issues on the driver installation page.
- Hit Shift+F10 to open the command prompt
- Type “OOBE\BYPASSNRO” and press enter.
Step 8: Get Windows 11 Ready
- Follow the setup instructions on your screen:
- Make a user account.
- Choose a password.
- Adjust privacy options.
- After setup finishes, you’ll see the Windows 11 desktop.
Step 9: Install Drivers and Tools
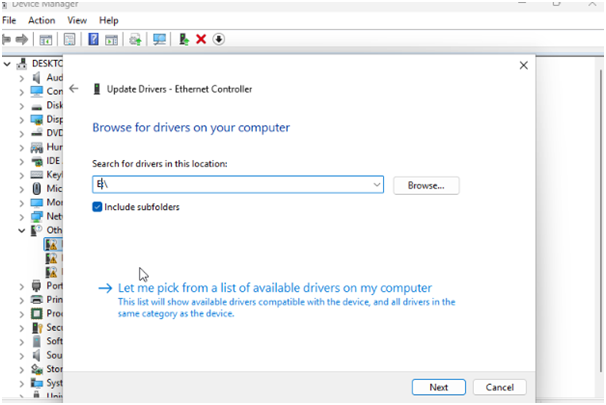
- Make sure all needed drivers (for network, graphics, etc.) are in place. Most VPS setups come with virtual drivers, so you might not need to install them yourself.
- Open Device Manager and update the Ethernet Controller. Browse disk: E as shown in the picture below.
Post-Installation Tips
- Activate Windows 11
- Head to Settings > System > Activation and type in your product key to get the operating system up and running.
- Turn on Remote Desktop
- To get into the VPS from afar, switch on Remote Desktop by going to Settings > System > Remote Desktop.
- Lock Down Your VPS
- Switch up the admin password from the default.
- Get antivirus software on there.Set up a firewall to beef up security.Boost Performance cut out apps you don’t need at startup.
- Tweak visual settings to speed things up.
Ensure the ISO is properly attached to the VPS and selected as the primary boot source.
Conclusion: – To wrap up Setting up Windows 11 on a VPS is easy if you stick to the steps in this guide. You might want to use it to work, create software, or run apps. Windows 11 gives you an up-to-date and dependable system for your virtual server. Just make sure you have everything you need beforehand, and don’t forget to lock down and fine-tune your VPS once you’ve got it installed. Enjoy your hosting!