When you browse the internet, you usually get some errors. The majority of them disappear when you refresh the page or reestablish the connection to the internet. However, in some cases, a few of them, including the ERR_CONNECTION_REFUSED error, may not disappear like that.
This error is mostly found in the Google Chrome browser and may look different on other browsers. This happens when the connection that your browser tries to make is refused.
The ERR_CONNECTION_REFUSED error is primarily on the user’s side, which means your device can be easily resolved. The following article will guide you through some methods of fixing the ERR_CONNECTION_REFUSED error on Chrome. These are relatively easy so ensure you read the whole article.
Now let us proceed with this article which will educate you on how to repair the ERR_CONNECTION_REFUSED error on Chrome in 11 simple ways, including the fundamental of it, i.e., what it is.
What is the ERR_CONNECTION_REFUSED Error?
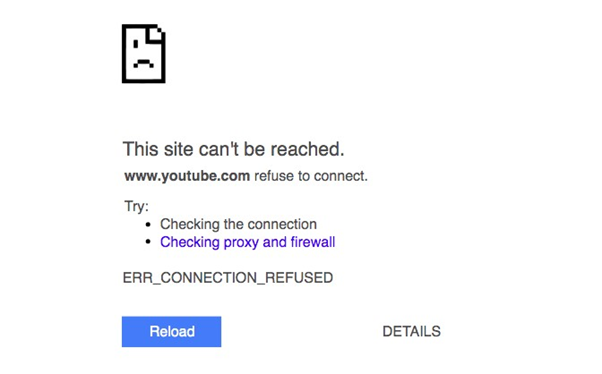
You get the ERR_CONNECTION_REFUSED error on Google Chrome when your browser is unable to initiate the connection with the webpage you requested. Simply put, it is refused.
As we have discussed above, this ERR_CONNECTION_REFUSED error will appear differently on various browsers. For instance, on Mozilla Firefox, this error reads “Unable to connect”, and on Microsoft Edge, it shows “Hmmm…can’t reach this page” when the ERR_CONNECTION_REFUSED error is encountered.
The ERR_CONNECTION_REFUSED is mainly generated as a result of some issue at the user-side, which may indicate that maybe there is an issue with the device you’ve used. Sometimes, though, it could even be on the Chrome side owing to the targeted web server.
How to Fix ERR_CONNECTION_REFUSED
By now, you have got the gist of the ERR_CONNECTION_REFUSED error. You understand that it happens on Chrome and may appear in some other form on other browsers. You also realize the reason why it happens.
So now, let us get straight to the point and find out how to resolve the ERR_CONNECTION_REFUSED on Chrome in 11 simple ways.
1. Check Whether the Website Is Down
When you purchase a hosting plan, you search for a quality hosting time. The majority of websites have some downtime. Maybe you are seeing that website in its downtime session. This implies the issue lies on the website’s side, not yours.
Verifying if a website is down might appear to be a bulky task, but it is not. That is because there are downtime checking tools like Website Planet, Site 24×7, and Host Tracker. For this, you just need to input the URL on the website on any of these tools.
These utilities will inform you if the website is down during its downtime. This indicates no issue with the website or Chrome’s end. So you might wait for some time and then attempt re-accessing the website. If it doesn’t appear again, it may be a device issue.
2. Restart Your Network Adapter
Another possible cause of the ERR_CONNECTION_REFUSED error is a poor internet connection. Well, here you are, a simple and straightforward solution to get rid of the ERR_CONNECTION_REFUSED error.
You can now reboot your network adaption, router, or modem. In your router, you can long press the power button, and a few minutes later, you can turn it off and reboot it. And in a modem, you can unplug the power supply, wait for a few minutes then replug it.
Or, if that solves the error ERR_CONNECTION_REFUSED, good. If not, do the next.
Also Read: How to Repair the “This Site Can’t Be Reached” Error
3. Troubleshoot Internet Connection
The second thing you might want to do if the above didn’t work out for you is troubleshoot your internet connection. Windows and Mac both have troubleshooters that come pre-installed, making your work even simpler. This will inform you of any problem and simple means to resolve them.
On Windows
- Navigate to Settings.
- Search for the Network & Internet menu.
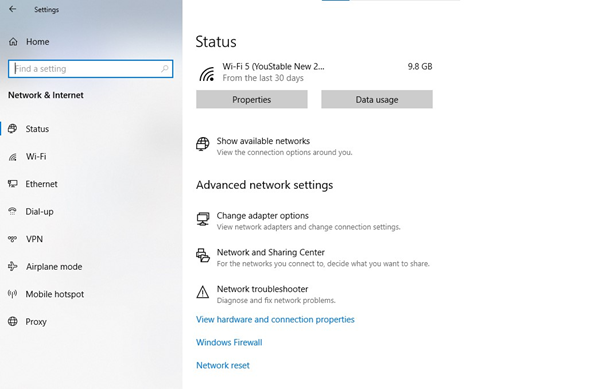
Network & Internet menu.
- Choose Troubleshoot.
- Choose the network adapter to be diagnosed and then Next.

- Wait until the analysis is done.
- If there are any problems, follow the recommended fixes.
- Close the troubleshoot and then restart the system.
On macOS
- Unplug all external devices except the monitor and keyboard.
- Shut down the system.
- Restart the system holding D.
- Choose a language.
- Wait for Apple Diagnostics to finish running.
- If issues are identified with your connection, it will offer solutions.
- Implement the solutions and restart the system.
Attempt to visit the website again. If you encounter the ERR_CONNECTION_REFUSED error again, proceed with the next method.
4. Turn Off Synchronization to Google
Google’s synchronization issues can sometimes lead to the ERR_CONNECTION_REFUSED error in Google Chrome. It is easy to turn it off.
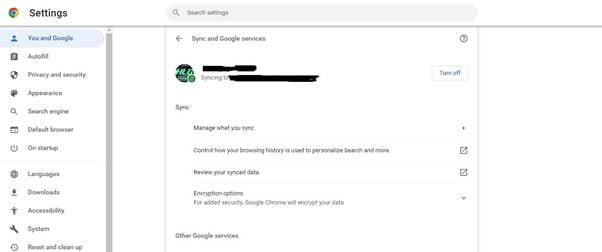
How to disable synchronization on Google Chrome?
- Click on the three dots at the top right of the Chrome browser.
- Go to Settings.
- Navigate to Sync and Google Services and then select Turn off.
Verify if the error has been fixed, otherwise, try the following way. Do not forget to turn the Google Synchronization on again.
5. Check Google Chrome Extensions
Using Google Chrome can be made simpler and useful by installing extensions. These extensions add to the capabilities of your Chrome browser and enable you to perform much more than browsing.
These Google Chrome extensions are usually third-party applications and thus are not completely in the hands of Google and its officials, so it becomes hard to keep an eye on them. And hence, sometimes, corrupt or outdated extensions can lead to the ERR_CONNECTION_REFUSED error.
Now, you may wish to review all the Google Chrome extensions that you are running, and we recommend that you delete any that are out of date.
You can delete Google Chrome extensions by following these steps:
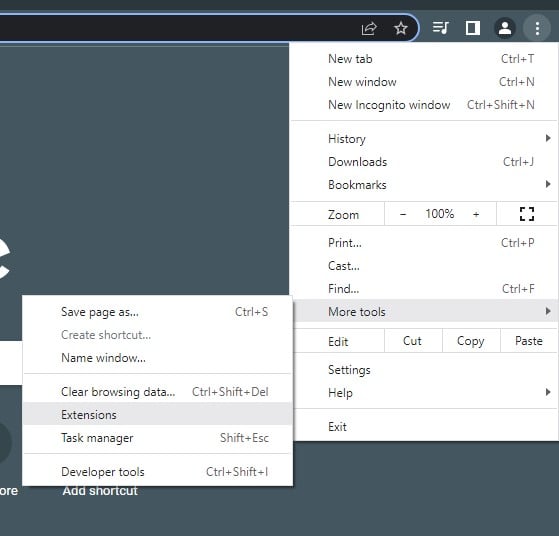
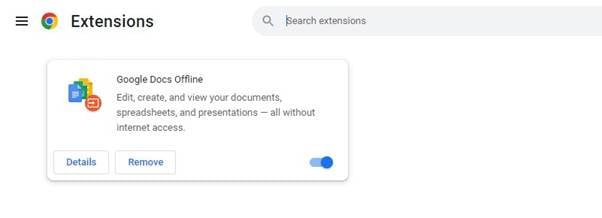
- Click the three dots menu, click More Tools, and choose Extensions.
- Find the extension that you wish to delete and click Remove and click Remove.
After you have finished uninstalling it, attempt to access the website again. If you encounter the ERR_CONNECTION_REFUSED error once again, you might attempt the following approach.
6. Reinstall Chrome
At times, when you have altered settings on your Google Chrome browser, these changes may result in errors like the ERR_CONNECTION_REFUSED error. Therefore, the best solution to this is to restore those settings to default. To achieve this, you might need to reinstall the Google Chrome browser.
But before you do so, you might want to try resetting the settings first.
- Open Chrome.
- Click on the three dots menu, navigate to Settings, and click on Advanced.
- Click Restore settings to their original defaults.
- Click Reset settings.
If the issue still persists, you can now reinstall your Google Chrome browser:
- Open Chrome.
- Now download the newest version of Google Chrome.
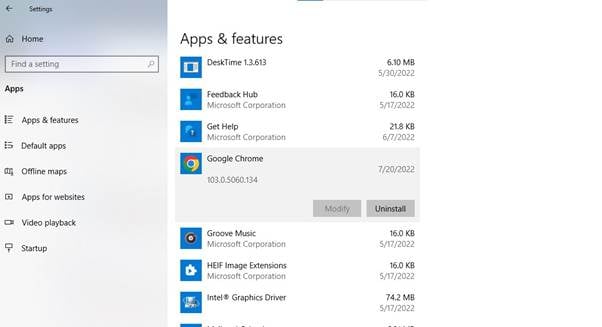
- Open Settings, navigate to Apps, and then choose Apps & features.
- Search for Google Chrome in the App list, click on the three dots menu, and choose uninstall.
- Run the previously downloaded Chrome installer.
7. Disable Antivirus and Firewall
Most people around the world are desperate to have access to your data and steal some of your most valuable things, such as your data and money. And so to keep your data away from the threat of it getting lost, you employ utilities like Antivirus and Firewalls.
These prevent attacks by bad sites, that harbor malware and viruses, to reach your website. The disadvantage with this, is Firewalls and Antivirus sometimes don’t go completely flawless.
At times, they may declare harmless websites as malware because of some problem in them. Thus disabling them temporarily may allow you to use the specific website. But you must have a backup of your data ready prior to going ahead.
To disable Antivirus and Firewall in Windows:
- Navigate to Settings and then Privacy & security.
- Choose Virus & threat protection.
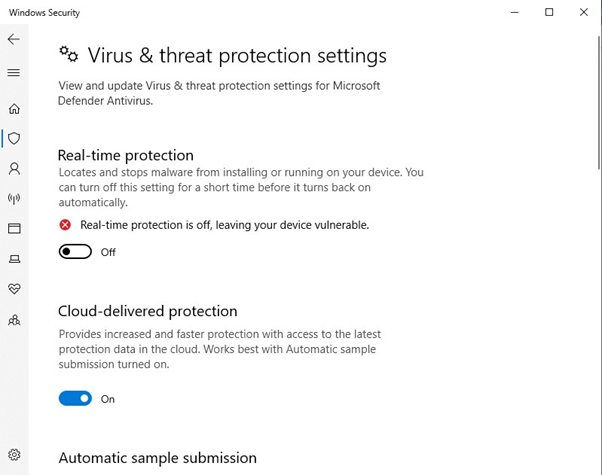
- Go to Virus & threat protection settings and select Manage settings.
- Turn off Real-time protection.
- Go to Firewall & network protection.
- Open all network profiles – domain network, private network, and public network when disabling Microsoft Defender Firewall.
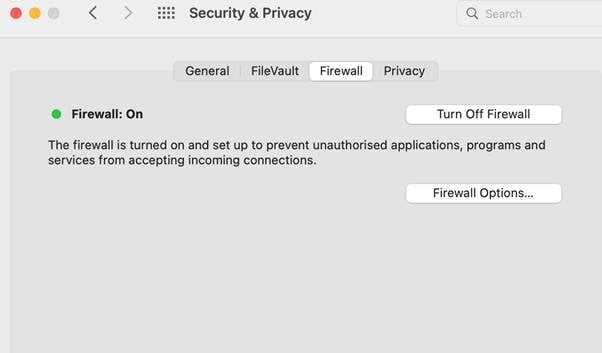
To turn off Antivirus and Firewall on macOS:
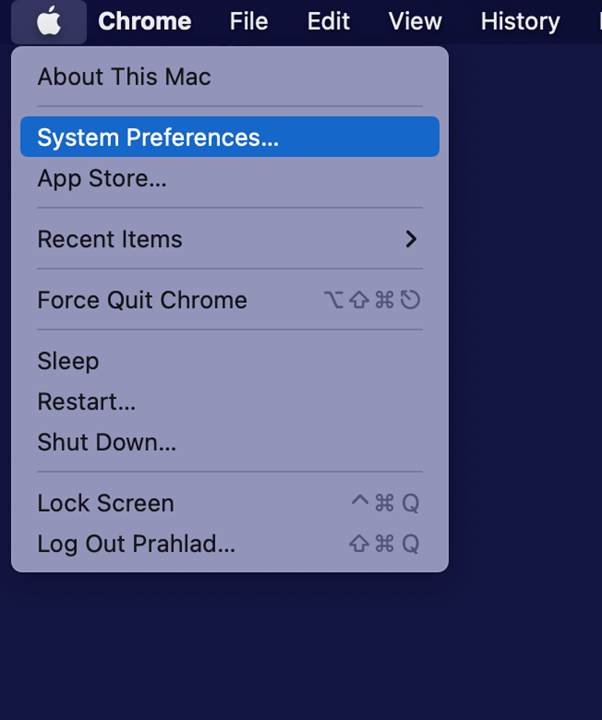
- Click on the top left corner Apple logo.
- Choose System Preferences and next choose Security and Privacy.
- Choose the Firewall tab.
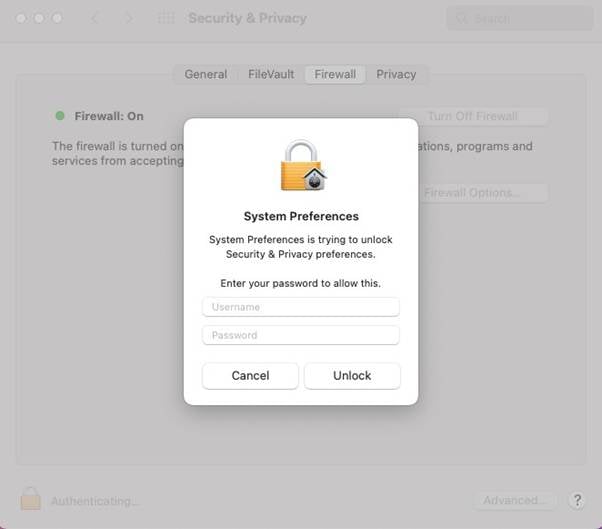
- Click on the lock icon and enter your password and username.
- After that has been unlocked, click Turn off Firewall.
- Click the lock icon again to prevent any more changes to the firewall settings.
8. Deactivate VPN
A Virtual Private Network or VPN is another utility individuals use for security and privacy purposes. These are not hardware and thus do not need to be managed and are highly reliable when it comes to keeping your identity hidden.
Because VPN is used for security purposes, it could also disrupt your browsing experience. Virtual Private Networks might block the site you wish to go to sometimes, which could lead to ERR_CONNECTION_REFUSED error.
Thus, disabling it temporarily could provide you access to the specific website. For instance, we will now discuss how to disable NordVPN:
- Open NordVPN client.
- Ensure that you’re logged onto a server and click Disconnect.
- Configure how long you wish to disable the VPN.
Also, ensure that you turn it on as soon as you can.
9. Clear Cache
The cache is quite handy for accelerating your website-related work. The cache holds the IP addresses and plenty of other website data so that you don’t have to keep loading it. But there are a few disadvantages to it.
Your cache may hold good memory and corrupt files, and these may produce many errors like the ERR_CONNECTION_REFUSED error. It is not a healthy practice to keep your cache saved for a prolonged period of time, so do clear it in time and remain away from such errors like ERR_CONNECTION_REFUSED.
So let us now clean your browser’s cache:
- Click the three dots menu, go to More tools, and choose Clear browsing data.
- In the Time range drop-down list, select All time.

- Make sure that all the browsing history, cookies, other site data, and Cached images and files are checked, and then click Clear data.
Try accessing the same website again, if it still doesn’t open, try the second method.
Flush DNS Cache
Similar to your browser cache, your domain name server or the DNS also stores cache. The only difference is that the content is stored. So let us now delete the cache from domain name servers and fetch the latest information from the website.
On Windows:
- Search for Command Prompt.
- Right-click on it and run Run as administrator.
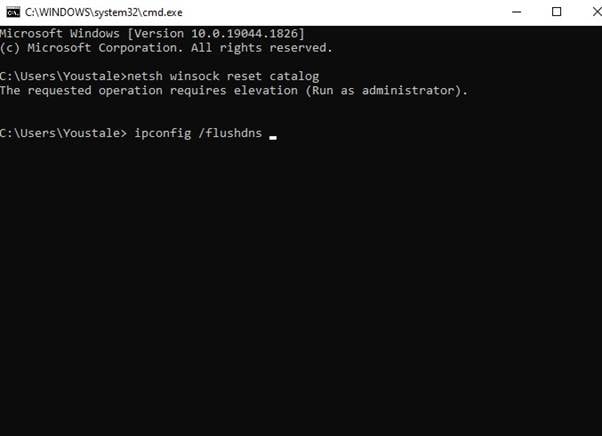
- Enter this command and press Enter: netsh winsock reset catalog
- Enter this command and press Enter: ipconfig /flushdns
On macOS:
- Go to Spotlight Search, search for Terminal, and open it.
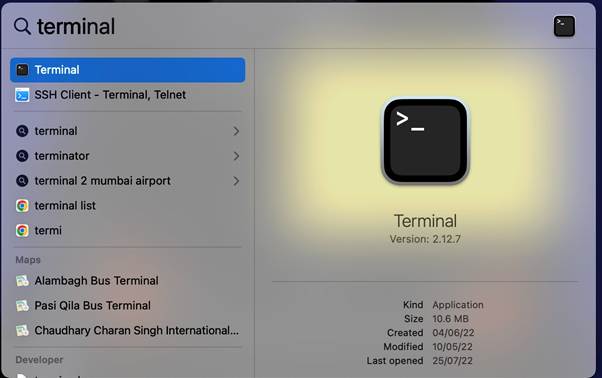
- Enter the following command in Terminal and press Enter: sudo dscacheutil -flushcache; sudo killall -HUP mDNSResponder
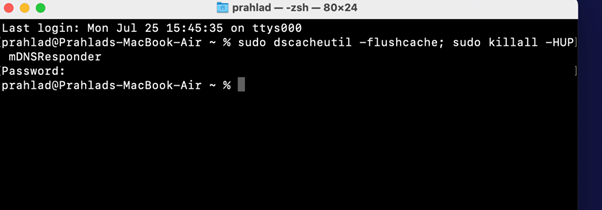
- Enter your password when prompted to start the DNS cache flush.
Attempt to re-access the website; if you are unable to do so, attempt the following method.
Also Read: How to Fix the DNS_PROBE_FINISHED_NXDOMAIN Error
10. Set up Proxy Server Settings
Another resource you can utilize for Privacy is proxy servers. A proxy server hides your IP address, takes a different IP address, and filters communication and cache memory.
Proxy servers might also be responsible for the ERR_CONNECTION_REFUSED error. Even when using a proxy, there can be multiple reasons to be listed, including improper proxy configuration, caching issues, or the web server blocking the proxy and the involved IP address.
Inspecting the proxy server setup is vital.
On Windows:
- Launch Control Panel.
- Navigate to Network and Internet, then Internet Options, then Connections, then LAN Settings.

- Ensure both Automatically detect settings and Use a proxy server for your
LAN are unchecked (These settings will have no effect on dial-up or VPN connections).
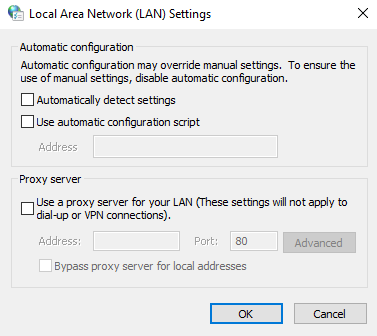
- Click OK
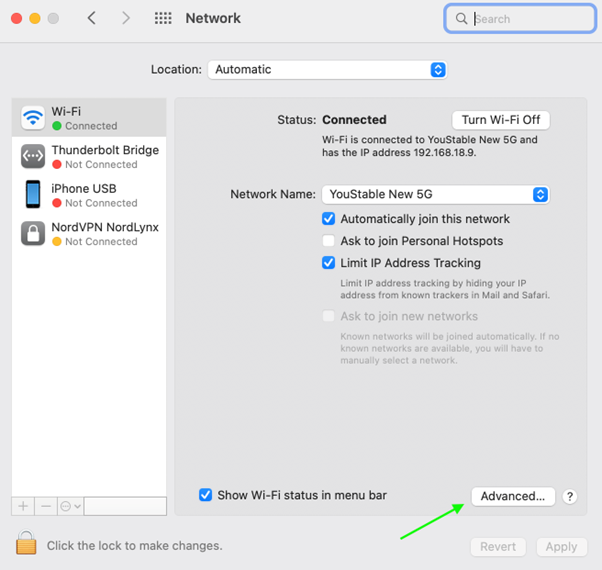
On macOS:
- Click on the Apple logo and then System preferences.
- Open proxy settings in Network, then Advanced, and then click on Proxies.
LKLJJLHJGJMB
- Deselect all available proxy protocols.
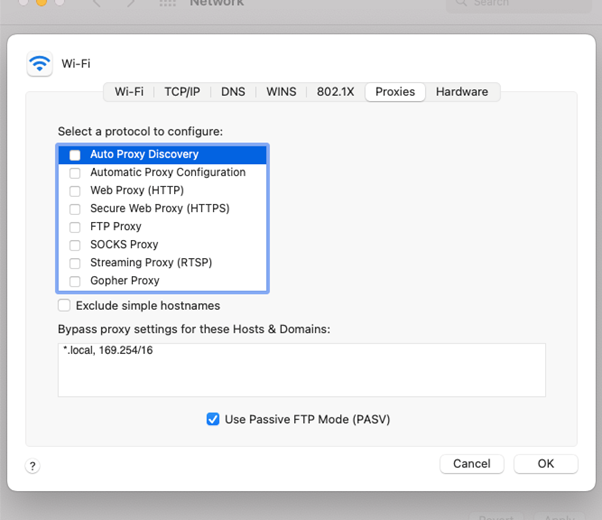
- Click OK.
Try to access the website again; if it still doesn’t open, try the last method.
11. Change DNS Server
Now the last option you have here is to change your DNS servers. Your internet service provider automatically gives you a set of DNS servers; however, if it does not work well, you can change it for good.
Also, do not worry; you need to pay for a new set of DNS servers. You can obtain several of them for free.
- Cloudflare DNS: 1.1.1.1 or 1.0.0.1
- Quad9: 9.9.9.9 or 149.112.112.112
- Google Public DNS: 8.8.8.8 or 8.8.4.4
- OpenDNS Home: 208.67.222.222 or 208.67.220.220
- AdGuard DNS: 94.140.14.14 or 94.140.15.15
On Windows:
- Go to Settings and then to Network & internet.
- Choose the internet connection you’d like to designate the new DNS for, i.e., Wifi.

Network & internet.
- Open Hardware properties.
- Right next to the DNS server assignment, click on Edit.
- Switch from Automatic to Manual.
- Select the internet protocol version (IPv) that your ISP uses.
- Switch to Google Public DNS. Enable IPv4 and fill in Google Public DNS’s Preferred DNS server and Alternate DNS server.
- Enable encryption. Select Encrypted preferred, unencrypted allowed for both DNS addresses.
- Click Save.
On macOS:
- Click on the Apple logo and then on System Preferences.
Open Network.
- Choose the network you would like to assign the new DNS to
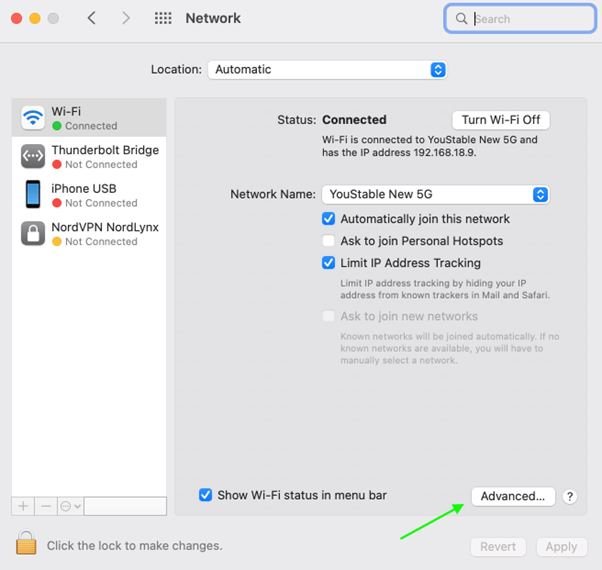
- Click Advanced.
- In the new window, open the DNS tab.
- Clear out the current DNS servers.
- Click + to enter the new DNS server addresses.
- Input your desired public DNS address.
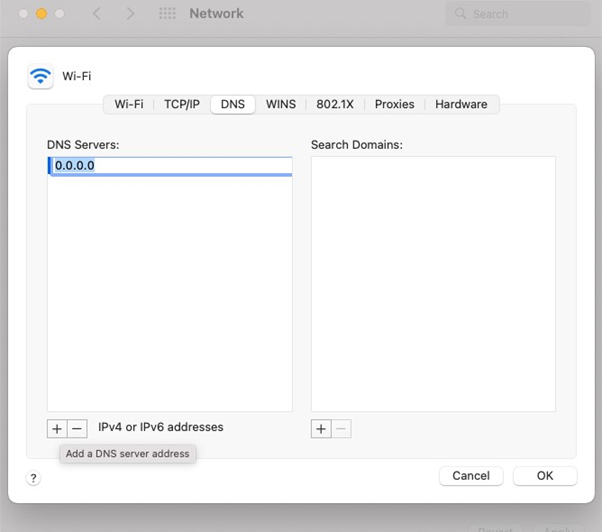
- Click OK
Read: How to Repair the Invalid JSON Error in WordPress Website
Conclusion
Congratulations, you are now at the end section of the article, which guides you on how to repair the ERR_CONNECTION_REFUSED error on Chrome. These steps are beginner-friendly, so do not worry if you are a newbie.
Also, it is crucial to protect your data from getting hacked or affected by other issues, so activate all the security features like Antivirus, Firewalls, VPN, etc., as soon as the task is completed. Also, form the habit of clearing cache and creating a backup.