

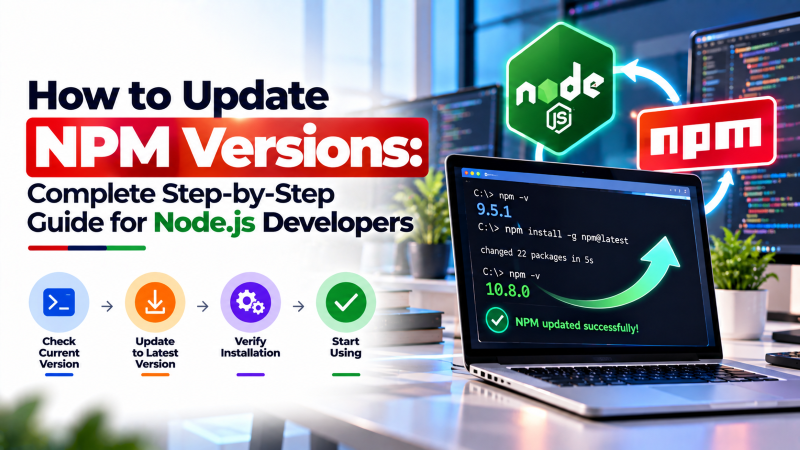
To update Node Package Manager (NPM) to the latest stable release, execute the global install command: npm install -g npm@latest (or sudo npm install -g npm@latest on Linux/macOS). To install a specific version, specify the version tag (e.g., npm install -g npm@10.8.2). For professional development and server environments, the industry standard practice is to manage Node.js and NPM versions simultaneously using Node Version Manager (NVM) via nvm install --lts and nvm use --lts. This prevents permission conflicts, eliminates the need for dangerous sudo execution, and allows seamless switching between Node.js runtime environments across different projects.
Node Package Manager (NPM) is the world’s largest software registry, hosting over two million open-source JavaScript packages used by millions of developers and enterprise organizations. As the default package manager distributed with Node.js, NPM handles dependency resolution, semantic versioning, build script orchestration, and package publishing across modern full-stack web applications. For verified technical specifications and deployment parameters, consult the official NIST National Vulnerability Database.
However, running an outdated NPM release exposes development pipelines to three severe operational bottlenecks:
- 1. Known Package Security Vulnerabilities: Leaves dependency resolution engines susceptible to supply-chain exploits and outdated SSL/TLS handshakes.
- 2. Strict Peer Dependency Conflicts: Triggers broken builds during automated CI/CD pipeline runs when lockfile v3 standards are missing.
- 3. Degraded Package Installation Speeds: Lacks modern concurrent tarball extraction and aggressive local cache caching optimizations.
This technical guide explains how to update NPM safely across Windows, macOS, and Linux operating systems, evaluates NVM runtime management, outlines package dependency upgrades using npm-check-updates, and provides production deployment best practices for Node.js hosting servers. For modern production environments, provisioning workloads on fast NVMe Linux VPS hosting for Node.js microservices provides dedicated vCPU allocations, ultra-fast NVMe storage, and complete root administrative access.
Why Keeping NPM Updated is Critical for Development
Regularly upgrading your NPM CLI tool provides three distinct operational advantages:
- Supply Chain Security & Vulnerability Auditing: Modern NPM versions include sophisticated security auditing tools (
npm audit). Upgrading NPM ensures your CLI incorporates the latest vulnerability signature databases, identifying compromised dependencies and malicious package injections before code reaches production. - Optimized Dependency Tree Resolution: Recent major releases of NPM (v8, v9, v10) introduced substantial improvements to the lockfile format (
package-lock.json v3) and parallelized tarball fetching. Updating NPM reduces clean install times (npm ci) by up to 40% in automated CI/CD pipelines. - Workspaces & Monorepo Support: Enterprise architectures increasingly rely on multi-package monorepos. Modern NPM versions provide native
workspacesfunctionality, eliminating the need for complex external orchestration tools like Lerna.
When running high-concurrency Node.js applications and microservices in production, deploying on fast NVMe Linux VPS hosting for Node.js microservices infrastructure ensures your asynchronous event loop benefits from dedicated vCPUs and low-latency NVMe disk I/O.
NPM Update Methods Comparison Matrix
Depending on your operating system and permissions model, choose between three primary NPM upgrade strategies:
| Upgrade Method | Command Syntax | Permission Needs | Version Switching | Recommended For |
|---|---|---|---|---|
| Standard Global Install | npm install -g npm@latest |
Requires Administrator / Sudo | Single global version only | Simple single-project workstations, standalone VMs |
| Node Version Manager (NVM) | nvm install --lts |
User-space only (Zero sudo required) | Instant switching per terminal tab | Professional developers, multi-client agencies |
| Corepack (Bundled Manager) | corepack use npm@latest |
User-space | Per-project package.json declaration | Modern Node.js 18+ environments, pnpm/Yarn setups |
For dedicated engineering teams managing staging sandbox builds, configuring sandbox environments using setting up isolated developer sandboxes on development VPS hosting prevents local runtime discrepancies from polluting staging branch tests.
Step-by-Step Runbook: Updating NPM Across All Platforms
Follow the command sequences below corresponding to your operating system:
1. Updating NPM on Windows
On Windows systems, running npm install -g npm from a standard command prompt often results in EPERM or file lock errors because the active Node executable directory is protected. Open PowerShell as Administrator and execute: For comprehensive implementation details and operational workflows, review our guide on setting up isolated developer sandboxes on development VPS hosting.
# Check current NPM version
npm -v

# Install latest stable NPM globally
npm install -g npm@latest

# Verify updated version
npm -v
2. Updating NPM on Linux & macOS using NVM (Best Practice)
The safest and cleanest way to manage Node and NPM on Linux or macOS is via Node Version Manager (NVM). NVM installs binaries inside your user’s home directory (~/.nvm), completely eliminating the need for dangerous sudo npm commands that can corrupt system file permissions:
# 1. Install or update NVM
curl -o- https://raw.githubusercontent.com/nvm-sh/nvm/v0.39.7/install.sh | bash
source ~/.bashrc

# 2. Install the latest Long-Term Support (LTS) Node.js release (comes with latest matching NPM)
nvm install --lts

# 3. Set the LTS version as your global default
nvm use --lts
nvm alias default 'lts/*'

# 4. If desired, upgrade NPM within this active Node runtime to the absolute newest release
npm install -g npm@latest
Upgrading Project Dependencies with npm-check-updates
Updating the NPM CLI tool itself is only the first step. You must also maintain the dependencies listed in your application’s package.json. Running npm update only respects semver constraints (e.g., minor bugfixes), leaving major package updates behind.
To audit and safely upgrade all project dependencies to their latest major releases, use the open-source utility npm-check-updates (ncu):
# 1. Inspect which project dependencies have updates available
npx npm-check-updates

# 2. Upgrade all dependency versions in package.json automatically
npx npm-check-updates -u

# 3. Execute a clean install to build updated lockfile and install modules
npm install

# 4. Run test suites to verify no breaking API changes occurred
npm test
In modern containerized deployments, encapsulating your Node.js runtime inside Docker containers provides immutable production consistency. Review our engineering runbook on containerizing Node.js applications with Docker Compose to deploy isolated microservice containers with zero host dependency conflicts.
Resolving Peer Dependency Conflicts: Legacy Peer Deps vs. Force
When updating NPM to version 7 or newer, developers frequently encounter strict peer dependency resolution errors during npm install. In older NPM versions, peer dependencies were largely advisory. Modern NPM versions automatically install missing peer dependencies and strictly block installation if conflicting version requirements exist between packages.
When legacy plugins conflict during continuous integration builds, developers evaluate two command flags:
npm install --legacy-peer-deps: Completely ignores peer dependency conflicts and bypasses peer dependency validation, matching the behavior of NPM v6. This is the recommended safe workaround for legacy projects while waiting for upstream package maintainers to publish updated semver ranges.npm install --force: Forces package installation by aggressively fetching matching versions even if contradictory requirements exist, potentially creating duplicate or conflicting runtime versions in yournode_modulesfolder. Avoid using--forcein production pipelines.
For enterprise development teams managing proprietary internal packages, configuring a project-level .npmrc file with scoped registry tokens (@mycompany:registry=https://npm.pkg.github.com) guarantees that private components install securely without public registry leakage.
Vulnerability Remediation: Automated Security Patching with npm audit
Node Package Manager includes built-in security intelligence powered by the GitHub Advisory Database. After upgrading NPM versions, running npm audit scans your project’s complete dependency graph against known Common Vulnerabilities and Exposures (CVEs) and categorizes risks as Low, Moderate, High, or Critical. To strengthen overall system reliability and security, explore our technical tutorial on containerizing Node.js applications with Docker Compose.
To automatically apply non-breaking security patches for vulnerable nested packages, execute npm audit fix. This instructs NPM to update transitive dependencies within safe semver ranges without altering your primary top-level package declarations. If critical vulnerabilities require breaking changes, use npm audit fix --force cautiously in isolated staging environments with comprehensive automated test coverage.
# 1. Run full vulnerability scan across production and development dependencies
npm audit

# 2. Automatically upgrade vulnerable sub-dependencies within semver limits
npm audit fix

# 3. Generate detailed JSON security audit report for CI/CD compliance
npm audit --json > security-audit-report.json
For developers and organizations scaling web applications or requiring dedicated virtual environments, exploring high-performance Linux VPS hosting delivers guaranteed NVMe storage, KVM hypervisor isolation, and full root access for production workloads.
Frequently Asked Questions
Why should I avoid running ‘sudo npm install -g’ on Linux?
Running npm with sudo grants root administrative permissions to arbitrary post-install lifecycle scripts bundled inside third-party packages. If a dependency contains malicious code, it executes with full root system authority. Always use NVM to manage packages within unprivileged user space.
How do I downgrade NPM to a specific older version?
To downgrade, simply specify the exact version tag in your install command: npm install -g npm@9.8.1. NPM will safely replace the active binary with the requested version.
What is the difference between ‘npm install’ and ‘npm ci’ in production?
npm install can update the package-lock.json file if semver ranges allow it. In contrast, npm ci (Clean Install) strictly requires an exact match with the lockfile, deletes existing node_modules, and installs identical packages reproducibly, making it mandatory for production CI/CD builds.
How do I clear the NPM cache if package installations fail?
Execute npm cache clean --force to purge corrupted tarballs and integrity hashes from your local NPM cache directory, then re-attempt package installation.
Does upgrading Node.js automatically update NPM?
Yes. Every release of Node.js comes bundled with a specific compatible version of NPM. However, because NPM releases updates more frequently than Node.js, you can manually upgrade NPM within your current Node release at any time.
Conclusion: Clean Node.js & NPM Version Management
Keeping NPM and Node.js up to date ensures your development environment benefits from performance optimizations, modern ECMAScript features, and crucial security vulnerability patches. Utilizing Node Version Manager (NVM) eliminates permission headaches and facilitates smooth project switching.