

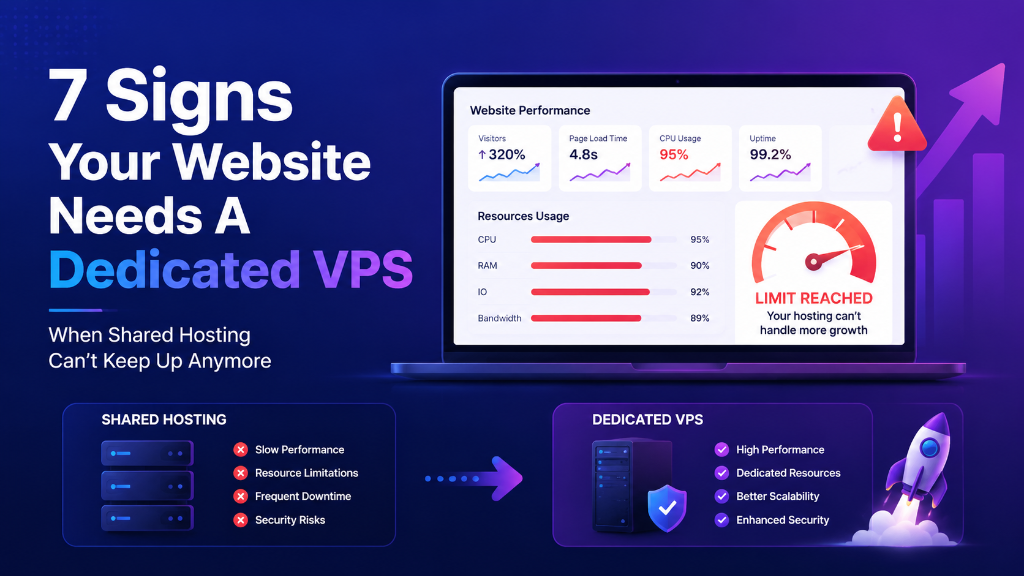
The 7 decisive signs you need to migrate from shared hosting to a dedicated VPS are: frequent 503 Service Unavailable / 504 Gateway Timeout errors, slow TTFB exceeding 800ms, exhaustion of shared CPU and memory limits (CloudLinux EP/LVE throttles), unpredictable performance caused by noisy neighbors, inability to install custom server packages (Node.js, Redis, Elasticsearch), blacklisted shared mail server IPs, and growing monthly traffic exceeding 30,000–50,000 monthly visits.
SRE
- Resource Bottleneck: Hosting forces hundreds of accounts to compete for a single CPU and RAM pool, artificially throttling traffic surges via CloudLinux LVE limits (503 Service Unavailable errors).
- The 7 Critical Warning Signs: Frequent 503/504 errors, TTFB exceeding 600ms, email deliverability drops from dirty shared IPs, blocked Redis/Memcached caching, inode exhaustion, and lack of root SSH access.
- Guaranteed KVM Autonomy: Migrating to a virtual private server provides 100% dedicated hardware cores, non-ballooning physical RAM, a clean dedicated IPv4 address, and complete root control.
- Zero-Downtime Migration: Lowering DNS TTL to 300 seconds and synchronizing databases over encrypted SSH tunnels via
rsyncguarantees seamless, zero-downtime cutover without loss of dynamic cart transactions.
- The Shared Hosting Architecture: Why It Inevitably Fails Under Scale
- The 7 Critical Warning Signs It’s Time to Upgrade to VPS
- Shared Hosting vs. KVM VPS: Architectural Comparison
- Step-by-Step Zero-Downtime Migration Runbook
- Post-Migration Optimization: Nginx, PHP-FPM & Redis Setup
- Frequently Asked Questions (FAQ)
The Shared Hosting Architecture: Why It Inevitably Fails Under Scale
In a standard shared hosting environment, anywhere from 200 to 1,500 distinct websites inhabit a single physical server rack. While this economy of scale keeps prices low, all tenants share a unified pool of physical resources: CPU cores, RAM modules, network interface cards (NICs), and disk I/O channels. For verified technical specifications and deployment parameters, consult the official NGINX Documentation.
To prevent a single rogue site from crashing the entire server, hosting providers deploy operating system overlays such as CloudLinux OS with Lightweight Virtual Environment (LVE). LVE sets strict hard caps on your cPanel account:
- SPEED (CPU Limit): Often capped at 100% of a single physical thread (1 vCPU equivalent).
- PMEM (Physical Memory): Typically restricted to 1 GB or 2 GB RAM max.
- EP (Entry Processes): Hard-capped at 20–30 simultaneous PHP-FPM requests.
- IO / IOPS: Disk throughput capped at 5 MB/s to 10 MB/s to prevent SAN saturation.
The moment your marketing campaign succeeds, a viral post hits social media, or search spiders crawl your site concurrently, your traffic immediately exceeds these LVE quotas. The server drops subsequent client requests, returning immediate 503 Service Unavailable errors to prospective buyers.
The 7 Critical Warning Signs It’s Time to Upgrade to VPS
How do you know when your website has outgrown shared hosting before suffering catastrophic revenue loss? Watch for these seven technical indicators:
my.cnf buffer pools, configure customized Nginx reverse proxy blocks, install SSL via Certbot wildcards, or audit security logs.Shared Hosting vs. KVM VPS: Architectural Comparison
| Feature Dimension | Shared Hosting | Dedicated KVM VPS Hosting |
|---|---|---|
| CPU Allocation | Shared pool, throttled under load | 100% Dedicated Hardware Cores |
| RAM Memory | Capped at 1–2 GB via LVE | Dedicated Non-Ballooning RAM (4GB–32GB) |
| IP Address Reputation | Shared among 500+ accounts | Clean Dedicated Static IPv4 / IPv6 |
| Caching Capabilities | Basic PHP file cache only | Redis, Memcached, FastCGI, Varnish |
| Root SSH Access | Restricted / Jailed Shell | Full Root UID 0 Access |
| Storage Subsystem | Shared SATA SSD with strict IOPS caps | High-Speed Enterprise PCIe NVMe Gen4 |
Step-by-Step Zero-Downtime Migration Runbook
Follow this battle-tested systems engineering workflow to migrate dynamic WordPress, WooCommerce, or custom PHP applications from shared hosting to a fresh VPS without dropping a single visitor or transaction:
Lower DNS TTL (Time To Live) to 300 Seconds
24 to 48 hours before migration, update your DNS A-Record TTL (at Cloudflare, Namecheap, or Route53) from 86,400 seconds (24 hrs) down to 300 seconds (5 minutes). This guarantees that global DNS caches refresh near-instantly when you point traffic to your new VPS IP.
Initial File Synchronization via Encrypted rsync
From your new VPS terminal, pull web directory files directly from the shared hosting server using rsync over SSH:
Export & Import Database with Consistent Transaction Isolation
Export the shared database cleanly using --single-transaction to prevent table locking, compress it, and import it into the VPS MySQL/MariaDB server:
Verify the Staging Site via Local Hosts File Before DNS Cutover
Never change DNS blindly. Test your new VPS deployment locally by mapping your domain to the new VPS IP in your local operating system’s hosts file (C:\Windows\System32\drivers\etc\hosts on Windows, or /etc/hosts on macOS/Linux):
YOUR_NEW_VPS_IP yourdomain.com www.yourdomain.com
Open an incognito browser window, log into your admin dashboard, test WooCommerce checkouts, submit contact forms, and verify SSL certificate binding.
Final Delta Synchronization & DNS Cutover
Place your shared site in maintenance mode for 2 minutes, re-run the rsync and database export commands to capture any delta changes made since the initial sync, and update your DNS A-Record to point to the VPS IP. Because your TTL was lowered to 300 seconds, traffic switches globally within 5 minutes.
Post-Migration Optimization: Nginx, PHP-FPM & Redis Setup
Once your site resolves to the new VPS, unlock high-performance acceleration that was impossible on shared hosting:
- Install Redis Object Cache: Configure Redis on a local Unix socket to cache database query objects in RAM, reducing MySQL query counts by up to 80%.
- Tune PHP-FPM Process Pools: Set
pm = ondemandorpm = dynamicwithmax_childrencalculated specifically for your available VPS memory. - Configure OPcache JIT: Enable PHP 8.3 OPcache with Just-In-Time compilation enabled for accelerated bytecode execution.
- Deploy Fail2ban & UFW: Configure an active firewall blocking brute-force SSH and XML-RPC attacks.
📌 Frequently Asked Questions (FAQ)
Q1 Will my website experience downtime during the migration to a VPS?
Q2 Do I need advanced Linux sysadmin skills to manage a VPS?
Q3 How much RAM and CPU cores should I choose for my first VPS?
Q4 Does moving from shared hosting to VPS improve SEO rankings?
When processing intensive multi-threaded database transactions or mission-critical enterprise workloads, deploying on enterprise dedicated server hosting provides bare-metal hardware performance, custom RAID arrays, and dedicated unmetered bandwidth.
Conclusion: Unlock Unthrottled Performance with Onlive Server VPS
Staying on shared hosting past your website’s natural threshold costs you revenue, visitor engagement, and search engine visibility. Upgrading to a virtual private server eliminates arbitrary resource caps, secures your email reputation, and delivers the dedicated hardware compute your growing business demands.
Ready to make the jump? Explore Onlive Server cheap VPS hosting plans equipped with enterprise PCIe NVMe storage, 1 Gbps high-speed ports, full root access, and 24/7 migration support to ensure your move is completely seamless and zero-downtime.
