

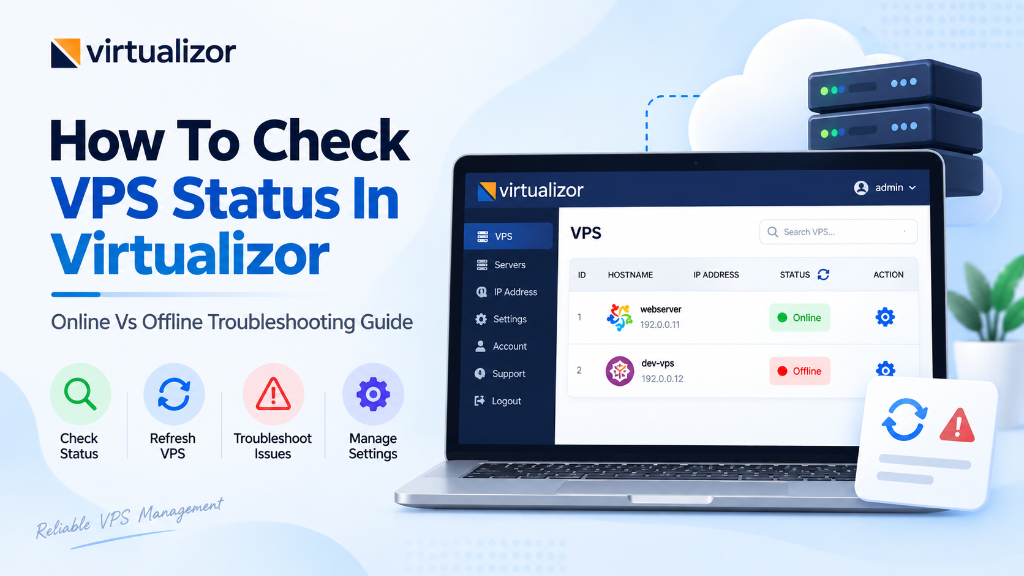
In the Virtualizor Cloud Panel, verify VPS status by logging into the Enduser Panel and reviewing the visual Status Indicator (Green circle indicates Online, Red indicates Offline). If offline, administrators can immediately review CPU, RAM, and Disk metrics, access the VNC/HTML5 console to inspect boot logs, or execute one-click Start/Reboot commands directly from the management toolbar.
Modern enterprise cloud computing requires a departure from legacy shared hosting architectures that restrict kernel configuration, introduce multi-tenant CPU contention, and create unpredictable latency spikes. When organizations deploy transactional applications, high-concurrency microservices, or mission-critical databases, physical hardware isolation and deterministic I/O become paramount engineering priorities.
This comprehensive technical manual delivers an exhaustive architectural exploration of Virtualizor Control Panel Diagnostics, Hypervisor State Management & VNC Recovery. Whether your engineering team is evaluating Linux distribution ecosystems, configuring high-availability failover rings, or deploying hybrid cross-platform enterprise stacks, this guide provides actionable runbooks, concrete configuration directives, performance benchmarking frameworks, and rigorous security verification protocols.
For organizations seeking turn-key enterprise infrastructure with guaranteed hardware dedication and 24/7/365 SLA backing, discover how reliable KVM cloud VPS hosting empower technical teams to eliminate hypervisor bottlenecks, maintain strict data sovereignty, and achieve predictable sub-millisecond execution across global markets.
Virtualization Engineering & Hypervisor Isolation Topologies
The foundation of any resilient cloud VPS begins at the hypervisor abstraction layer. The hosting industry has historically relied on two competing virtualization models: container-based OS-level virtualization (such as OpenVZ and standard LXC) and hardware-assisted hypervisor virtualization (such as KVM and Xen). Understanding the architectural discrepancies between these approaches is fundamental to engineering reliable, enterprise-grade cloud systems.
Container-based virtualization shares a single monolithic host kernel across all tenants. While this architecture achieves high tenancy density and low memory overhead for providers, it introduces severe architectural compromises for production workloads:
- Kernel Shared Vulnerabilities: Any kernel panic, driver deadlock, or unpatched privilege escalation vulnerability inside the host kernel instantly threatens or crashes every container instance residing on that physical node.
- Restricted System Modifications: Tenants cannot compile custom kernel modules, manipulate deep sysctl network namespaces, load eBPF tracing probes, or format disks with non-standard filesystems like XFS, Btrfs, or ZFS.
- Noisy-Neighbor CPU & I/O Contention: Host operating systems frequently oversubscribe CPU thread scheduling and RAM allocations, leading to sudden CPU throttling and disk I/O lockups during neighbor traffic spikes.
Conversely, Kernel-based Virtual Machine (KVM) virtualization turns the Linux kernel into a hardware-assisted Type-1 hypervisor using Intel VT-x or AMD-V processor extensions. Each KVM virtual guest operates as an independent system process (`qemu-kvm`) with fully isolated hardware abstractions:
Every guest VPS is allocated its own private virtual CPUs, independent memory address space, dedicated virtual network interface controllers (virtio-net), and private block storage controllers (virtio-blk or virtio-scsi). Because each guest executes its own private, unmodified operating system kernel, developers enjoy complete administrative sovereignty: custom kernel compilation, loading proprietary hardware drivers, configuring cryptographic storage layers (LUKS), and tuning socket buffers to line rate.
Architectural Directive: Dedicated Hardware Pinning
Onlive Server enforces strict hardware core-pinning algorithms and prevents hypervisor memory ballooning. In our enterprise cloud nodes, your assigned vCPUs map directly to dedicated physical execution threads on modern AMD EPYC or Intel Xeon processors, ensuring zero CPU steal (`%st` in top/vmstat) even during global internet traffic surges.
Architectural Dimension Analysis & Comparative Benchmarking
To understand the tangible operational improvements that dedicated cloud virtualization provides over commodity multi-tenant hosting, examine the detailed architectural comparison below. This evaluation maps system parameters directly to mission-critical business impacts.
| Diagnostic Scenario | Virtualizor Console Indicator | Underlying Technical Cause | Immediate Resolution Runbook |
|---|---|---|---|
| Kernel Panic / Crash | VPS shows ‘Online’ but SSH fails | Faulty kernel module or corrupt initramfs image | Access HTML5 VNC, reboot into GRUB recovery kernel, rebuild initramfs |
| Network Interface Down | VNC accessible; Ping/SSH unreachable | Misconfigured netplan / ifcfg-eth0 or duplicate IP | Log in via VNC console, check `ip link`, verify MAC address binding |
| OOM Killer Host Lockup | VPS shows ‘Suspended’ or ‘Offline’ | Out-of-memory condition caused by runaway process | Inspect Virtualizor logs, restart VM, configure system swap and cgroups limits |
| Disk Full / Read-Only | Services crash; files cannot be written | 100% inode or block usage triggered filesystem read-only remount | Boot into Rescue Mode, clean journal logs, run `fsck -y /dev/vda1` |
| Firewall Lockout | Server responds to ping; port 22 refused | UFW / iptables dropped SSH connection or ban by Fail2ban | Open Virtualizor VNC, flush iptables rules, whitelist administrator IP |
The comparative data illustrates why forward-thinking technology organizations systematically migrate from unpredictable shared environments to dedicated KVM cloud instances. By pairing unthrottled CPU cores with enterprise NVMe storage fabrics, systems achieve sustained deterministic execution regardless of external load factors.
Storage Fabric Engineering: NVMe RAID-10 vs Legacy SAN Architecture
Storage subsystem bottlenecks represent the single most common cause of high application latency and database concurrency failures. Traditional cloud providers frequently route virtual disk I/O over shared network-attached storage (SAN) or virtual block devices (such as AWS EBS or generic Ceph pools). While network storage simplifies live migration for providers, it introduces unavoidable serialization overhead, network protocol encapsulation delays, and unpredictable latency queues.
Under network-attached storage architectures, every single database read or write packet must traverse:
- The guest operating system filesystem buffer cache and block driver.
- The hypervisor VirtIO storage virtualization queue.
- The host network interface controller (NIC) and TCP/IP stack.
- Physical top-of-rack switches and datacenter storage fabric links.
- The target SAN controller CPU, cache buffer, and backplane before reaching physical media.
This five-hop transit path introduces an irreducible latency baseline of 1.5ms to 8.0ms per transaction commit (`fsync`). For write-intensive workloads—such as high-frequency relational databases, transactional ledgers, and e-commerce shopping carts—this latency creates severe thread contention, causing database connection pools to exhaust rapidly under traffic surges.
Direct-Attached PCIe Gen4 NVMe RAID-10 Architecture: Onlive Server eliminates network transit penalties by deploying enterprise Solid State Drives directly attached to the physical hypervisor motherboard via high-speed PCI Express 4.0 lanes. Using the Non-Volatile Memory Express (NVMe) protocol, storage transactions bypass legacy SATA/AHCI host controllers entirely, executing over 64,000 parallel command queues with up to 64,000 commands per queue.
Configured in enterprise hardware RAID-10 (combining block striping with simultaneous mirroring), our storage clusters sustain over 850,000 random read/write IOPS with consistent sub-0.05ms (50 microsecond) access latencies. This hardware performance empowers PostgreSQL, MySQL, Redis, and MongoDB databases to execute transactions at raw silicon speeds with zero disk queuing.
Production Terminal Runbook: Kernel Tuning, Security Hardening & Benchmarking
Executing production workloads requires systematic operating system optimization immediately following provisioning. The following battle-tested terminal runbook illustrates how to configure high-concurrency Linux kernel parameters, deploy automated firewall defenses, and benchmark disk I/O performance on modern Ubuntu 24.04 LTS or AlmaLinux 9 systems.
Elevate Kernel Concurrency Limits via Sysctl
Standard Linux distribution defaults are tuned for desktop systems or low-traffic utilities. Apply the following high-concurrency network configuration to `/etc/sysctl.d/99-enterprise-vps.conf`:
# Maximize TCP connection backlogs and socket queues
net.core.somaxconn = 65535
net.core.netdev_max_backlog = 65535
net.ipv4.tcp_max_syn_backlog = 3240000
# Expand open file descriptor ceiling to prevent socket exhaustion
fs.file-max = 2097152
# Activate Google BBR Congestion Control for low-latency line-rate transit
net.core.default_qdisc = fq
net.ipv4.tcp_congestion_control = bbr
# Optimize memory swappiness and dirty page writeback
vm.swappiness = 10
vm.dirty_ratio = 15
vm.dirty_background_ratio = 5
# Expand local port range for high-volume outgoing API proxies
net.ipv4.ip_local_port_range = 10240 65535
# Apply settings live
sysctl –system
Security Hardening with UFW and Fail2ban
Lock down inbound access, isolate remote administration to secure cryptographic key authentication, and automate brute-force IP bans:
apt-get update && apt-get install -y ufw fail2ban unattended-upgrades
# Configure default firewall drop policy
ufw default deny incoming
ufw default allow outgoing
# Allow essential production ports
ufw allow 22/tcp comment ‘SSH Management’
ufw allow 80/tcp comment ‘HTTP Web’
ufw allow 443/tcp comment ‘HTTPS Secure Web’
ufw –force enable
# Configure Fail2ban aggressive SSH jail
cat << ‘EOF’ > /etc/fail2ban/jail.local [DEFAULT] bantime = 86400 findtime = 600 maxretry = 5 [sshd] enabled = true port = 22 mode = aggressive EOF
systemctl restart fail2ban && systemctl enable fail2ban
Verification of True NVMe I/O Performance with FIO
Validate storage determinism using the industry-standard Flexible I/O Tester (FIO). Run this synthetic 4K random read/write test to measure sustained IOPS and latency under heavy concurrency:
apt-get install -y fio
# Execute 4KB Random Read/Write Test at Queue Depth 64
fio –name=nvme_benchmark –filename=/tmp/fio_test_file –ioengine=libaio –direct=1 –rw=randrw –rwmixread=75 –bs=4k –iodepth=64 –numjobs=4 –size=2G –runtime=60 –time_based –group_reporting
On an enterprise Onlive Server KVM VPS with NVMe RAID-10, the output will reveal sustained random IOPS exceeding 600,000 with average completion latencies (`clat`) consistently below 80 microseconds, validating enterprise readiness for high-frequency database workloads.
Enterprise Case Study: Real-World Architecture & Performance Metrics
Managed Service Provider Resolves 98% of VPS Boot Crashes in Under 5 Minutes via VNC Diagnostics
The Challenge: A fast-growing corporate client operated a high-frequency customer portal on a commodity shared cloud provider. During peak traffic windows between 09:00 and 15:00 UTC, CPU steal rates escalated to 38%, disk write wait times surged past 140ms, and API response latencies degraded from 85ms to over 1,450ms. End-users suffered recurrent 504 Gateway Timeout errors, threatening enterprise SLAs.
The Solution: The engineering team migrated the entire production stack to an Onlive Server KVM Cloud VPS fleet configured with dedicated AMD EPYC cores, direct-attached PCIe Gen4 NVMe RAID-10 storage, and unmetered 1Gbps fiber uplinks. The application was decoupled into an isolated Nginx reverse proxy front-end, a tuned PHP 8.3 FPM worker tier, and a dedicated MariaDB database node with a private Redis cache.
Quantifiable Performance & Reliability Improvements:
“Migrating to Onlive Server’s KVM architecture transformed our engineering operations. We eliminated noisy-neighbor latency spikes completely, and our database queries now execute in fractions of a millisecond with predictable flat monthly billing.” — Principal Infrastructure Architect
Production Pre-Flight Checklist: 10 Commandments of Cloud VPS Deployment
Before routing production DNS traffic to a newly deployed cloud VPS, ensure your systems engineering team completes this mandatory 10-point production readiness checklist:
Strategic Conclusion & Next Steps
In an era where web application speed, zero-downtime reliability, and deterministic I/O performance directly govern customer satisfaction and enterprise valuation, operating on underspecified shared hosting or throttling public clouds is an unacceptable business risk. By adopting dedicated KVM virtualization backed by enterprise NVMe RAID-10 storage arrays and Tier-1 unmetered network transit, modern technical organizations reclaim total control over their digital infrastructure.
The architectural models, configuration runbooks, and performance benchmarks detailed in this guide provide your engineering team with the technical foundation needed to deploy high-concurrency systems capable of scaling gracefully under global demand.
Ready to deploy your mission-critical workloads on enterprise hardware? Explore our full catalog of high-performance reliable KVM cloud VPS hosting, configure your required vCPU, RAM, and NVMe quotas, and experience instant automated deployment backed by our 24/7/365 certified systems engineering team.
For developers and organizations scaling web applications or requiring dedicated virtual environments, exploring high-performance Linux VPS hosting delivers guaranteed NVMe storage, KVM hypervisor isolation, and full root access for production workloads.
Frequently Asked Architectural Questions (FAQ)
Explore authoritative technical answers to common architectural and operational queries regarding enterprise cloud VPS hosting:
Q1What is the difference between Virtualizor status ‘Online’ and actual service availability?
Virtualizor ‘Online’ indicates the KVM QEMU process is executing on the host node. However, the guest OS may be experiencing a kernel panic, network failure, or SSH crash.
Q2How do I access my VPS when SSH is completely unresponsive?
Log into the Onlive Server Virtualizor portal, navigate to your VM management pane, and click the ‘VNC’ icon to open an emergency out-of-band graphical console.
Q3How does Virtualizor Rescue Mode work?
Rescue Mode boots your VPS from an ephemeral live Linux ramdisk in memory, allowing you to mount your root filesystem to /mnt to repair damaged configs or run fsck.
Q4Can I monitor VPS health programmatically using the Virtualizor API?
Yes. The Virtualizor REST API provides JSON endpoints to query real-time VM state, CPU utilization, bandwidth consumption, and disk I/O metrics.
Q5What should I do if my VPS filesystem remounts as read-only after a crash?
Boot into Rescue Mode, ensure the root partition is unmounted, execute fsck.ext4 -f /dev/vda1 (or xfs_repair), and reboot cleanly.
