

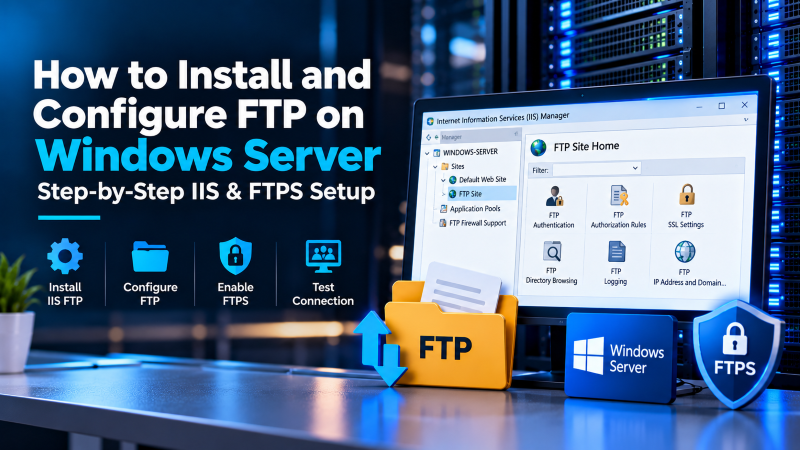
To install FTP on Windows Server, launch Server Manager, open Add Roles and Features, expand Web Server (IIS), and select FTP Server and FTP Service. Once installed, open IIS Manager, create an FTP Site bound to port 21, assign an SSL certificate for secure FTPS, define user authorization rules, and open passive data ports in Windows Defender Firewall.
Why Deploy Native FTP on Windows Server?
File Transfer Protocol (FTP) remains essential for scheduled enterprise file delivery, system backups, and automated asset deployment. Windows Server provides native FTP functionality inside Internet Information Services (IIS), providing enterprise user isolation and Active Directory integration.
Third-party transfer tools often introduce unmonitored ports and security risks. Leveraging native IIS FTP on a high-performance Windows VPS gives administrators integrated Windows authentication and granular NTFS permission controls.
Native IIS also supports Secure FTP over TLS/SSL (FTPS). This ensures user passwords and file payloads remain fully encrypted against network inspection.
Step 1: Installing the IIS FTP Server Role
Enabling FTP requires adding IIS Web Server components. You can complete this through Server Manager or an elevated PowerShell terminal.
In Server Manager, select Add Roles and Features. Select Role-based or feature-based installation and pick your local server from the pool.
Scroll down to Web Server (IIS) and expand the tree to find FTP Server. Check both FTP Service and FTP Extensibility, then finish the wizard without rebooting.
For automated deployments, execute this PowerShell command:
Install-WindowsFeature Web-FTP-Server, Web-FTP-Service -IncludeManagementToolsThis command registers the FTP service daemon and loads administrative consoles instantly.
Step 2: Creating Dedicated Users and Securing Directories
Never permit FTP connections using the default Windows Administrator account. Creating restricted local user accounts isolates file access strictly to designated directories.
Open Computer Management (compmgmt.msc), navigate to Local Users and Groups, and right-click Users to add a new user such as ftpuser01 with a strong password.
Next, establish a physical directory such as C:\inetpub\ftproot\data. Right-click the folder, select Properties, and open the Security tab.
Strip inherited permissions and grant ftpuser01 Modify, Read & Execute, and Write permissions. For organizations running a dedicated Windows server, isolating separate customer roots prevents lateral directory traversal across tenant repositories.
Step 3: Creating and Configuring the FTP Site in IIS Manager
Open IIS Manager from Administrative Tools. In the Connections pane, right-click Sites and choose Add FTP Site.
Enter a site name such as Corporate-FTP and select your physical directory path. Click Next to configure network bindings and SSL encryption.
Assign your static IP address or choose All Unassigned on port 21. Check Start FTP site automatically to ensure availability after system reboots.
Under SSL, choose Require SSL to mandate TLS encryption for all handshakes. Select your installed server SSL certificate from the dropdown list to guarantee encrypted communications.
Step 4: Configuring Authentication and Passive Data Ports
Under Authentication, select Basic authentication and disable Anonymous access to block unauthenticated public connections.
Under Authorization, set Allow access to to Specified users, and enter ftpuser01. Check both Read and Write permissions, then click Finish.
FTP requires a command channel on port 21 and a dynamic data channel for transfers. To set passive mode ports, select the server node in IIS Manager and open FTP Firewall Support.
Enter a passive Data Channel Port Range, such as 50000-50100, and specify your public external IPv4 address. Click Apply to save changes.
Step 5: Configuring Windows Defender Firewall Rules
Windows Defender Firewall blocks incoming connections by default. You must permit inbound traffic on port 21 and your passive data port range.
Run these PowerShell commands in an administrative terminal:
New-NetFirewallRule -DisplayName "FTP Port 21" -Direction Inbound -LocalPort 21 -Protocol TCP -Action Allow
New-NetFirewallRule -DisplayName "FTP Passive Data" -Direction Inbound -LocalPort 50000-50100 -Protocol TCP -Action Allow
These rules permit command negotiations while allowing concurrent binary file transfers without dropped packets. If complex corporate proxy routing causes timeouts, consulting a certified systems engineer helps optimize firewall configurations.
Testing and Validating FTPS Connectivity
Validate your deployment using an FTP client like FileZilla or WinSCP. Set the protocol to FTP – File Transfer Protocol and choose Require explicit FTP over TLS.
Enter your server IP address, username (ftpuser01), password, and port 21. Confirm the TLS certificate dialog displays your valid fingerprint and test upload functionality.
Configuring Secure FTPS with TLS Certificates and User Isolation
Deploying standard File Transfer Protocol (FTP) across public networks is a severe security hazard because legacy FTP transmits login credentials and transferred file contents in clear text. Configuring FTP over SSL/TLS (FTPS) within Internet Information Services (IIS) encrypts all control commands and data streams using AES ciphers.
To establish FTPS, administrators must bind an authentic SSL certificate within IIS Manager and configure SSL Policy settings to require 128-bit encryption for both control channels and data channels. Unencrypted connections must be explicitly rejected to safeguard administrative accounts from packet sniffing attacks.
Furthermore, implementing IIS FTP User Isolation ensures that multiple team members or client users can access the same FTP service without viewing each other’s directories. Each authenticated user is automatically chrooted into their dedicated personal subfolder upon login, establishing rigorous multi-tenant security boundaries.
Configuring Passive Port Ranges and Windows Defender Firewall
FTP operates using two distinct communication channels: a command port (default TCP port 21) and a dynamic range of data ports used for file uploads, downloads, and directory listings. In passive mode, the server opens a high-numbered port range and informs the client which port to connect to for data transfers.
- Define Passive Port Range: Navigate to IIS Server Level > FTP Firewall Support and specify a fixed passive port range, such as
50000-51000. - Specify External IP Address: Enter your Windows Server’s public IPv4 address under “External IP Address of Firewall” so passive clients connect correctly.
- Windows Firewall Inbound Rule: Open TCP port 21 and the specified passive port range (50000-51000) in Windows Defender Firewall with Advanced Security.
- Cloud Hypervisor Security Groups: Ensure external cloud firewall rules permit inbound traffic on your passive port pool.
Hardening Windows Server FTP: NTFS Permissions and Automated Auditing
Configuring IIS permissions is only half the security equation; administrators must align Windows NTFS filesystem access controls to prevent unauthorized directory traversal. The local IIS_IUSRS group and specific FTP user accounts should only possess the minimum required read and write permissions on target folders.
Enabling detailed W3C logging for FTP services creates timestamped audit trails of every connection attempt, file transfer, rename event, and deletion. Integrating Windows Event Viewer alerts ensures immediate notification if brute-force authentication attacks target your server.
- Strict NTFS ACL Configuration: Remove broad “Everyone” and “Users” permissions from FTP root directories to enforce strict user isolation.
- FTP IPv4 Address and Domain Restrictions: Restrict FTP administrative logins strictly to authorized corporate office IP subnets.
- FTP Logon Attempt Restrictions: Configure automated IP banning after five consecutive failed password attempts within IIS.
- PowerShell Automated Management: Automate new FTP user provisioning and home directory creation using the
WebAdministrationPowerShell module.
For businesses seeking a stable, easy-to-manage web hosting foundation with cPanel or DirectAdmin control, choosing reliable Linux web hosting guarantees high uptime reliability and automated backups.
Conclusion: Enterprise-Ready File Transfers on Windows Server 2022
Installing and configuring an IIS FTP server on Windows Server 2022 provides organizations with a robust, centralized file transfer platform capable of handling large-scale enterprise workflows. By replacing unencrypted FTP with hardened FTPS, administrators ensure comprehensive confidentiality for all corporate data assets.
Frequently Asked Questions
What is the primary difference between FTP, FTPS, and SFTP?
Plain FTP transmits data and credentials in cleartext over port 21. FTPS adds SSL/TLS encryption to native FTP protocols using standard IIS architecture. In contrast, SFTP (SSH File Transfer Protocol) operates entirely over Secure Shell (SSH) port 22 and requires an SSH daemon like OpenSSH rather than IIS FTP.
Why does FileZilla Client hang at “Entering Passive Mode” on Windows Server?
This issue occurs when the passive data port range (e.g., 50000–50100) or external server IP is not configured in IIS “FTP Firewall Support,” or when Windows Firewall blocks incoming connections on those passive data ports. Configuring both the port range and firewall rules resolves the timeout.
How do I isolate individual FTP users to their own folders in IIS?
In IIS Manager, select your FTP Site, double-click “FTP User Isolation,” and choose “User name directory (disable global virtual directories).” Create subfolders matching user account names under your root directory to confine users strictly to their own folders.
Can I use a free Let’s Encrypt SSL certificate for IIS FTPS?
Yes. You can use automated Windows ACME clients like win-acme or Certify The Web to generate and auto-renew Let’s Encrypt certificates. The client installs the certificate into the Windows Certificate Store, where IIS FTP can bind it directly.
How do I restart the Windows FTP service after making configuration changes?
You can restart the FTP service via PowerShell by running Restart-Service ftpsvc or through the Services management console (services.msc) by locating “Microsoft FTP Service” and clicking Restart.