

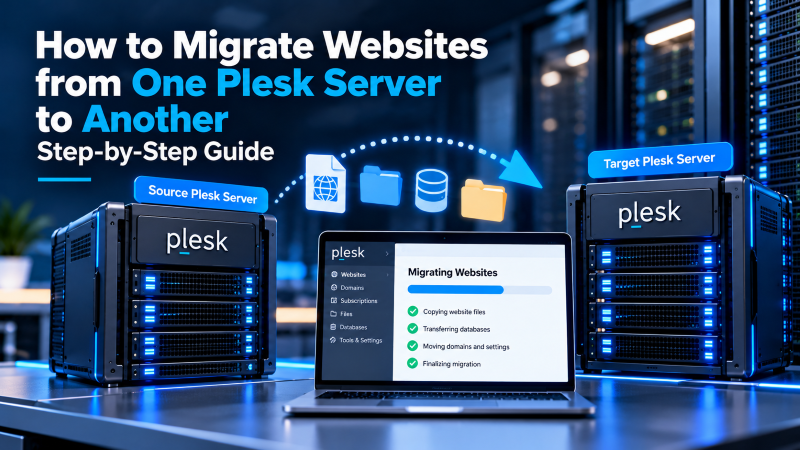
To migrate websites between two Plesk servers with zero downtime, utilize the official Plesk Migrator Extension on your destination server. Establish an authenticated SSH root connection (port 22) or RPC connection to the source Plesk server, select the target subscriptions, and execute an initial data sync (transferring virtual host files, databases, mailboxes, and DNS records). Before updating public DNS nameservers, test site functionality locally via hosts file redirection. Finally, lower your DNS Time-to-Live (TTL) to 300 seconds, perform a fast differential sync to transfer newly created orders/database records, and execute the final DNS cutover.
Server migration is one of the most critical operations a systems administrator or agency performs. Whether you are upgrading from an aging virtual private server to high-performance dedicated hardware, migrating to a new datacenter region, or consolidating multiple web hosting subscriptions, executing a migration smoothly without disrupting customer traffic is essential. For verified technical specifications and deployment parameters, consult the official Linux Kernel Documentation.
The Plesk control panel powers millions of production websites globally. Transferring complex multi-tenant environments requires executing three systematic migration phases:
- 1. Pre-Migration Dependency Audit: Validates PHP versions, MySQL/MariaDB collation compatibility, and active Apache/Nginx web server modules.
- 2. Automated Data Synchronization: Leverages the Plesk Migrator extension via secure SSH tunnels to transfer files, databases, and mail accounts.
- 3. Zero-Downtime DNS Cutover: Lowers zone TTL values in advance to ensure instant global traffic routing without dropped visitor connections.
This technical migration runbook explains the mechanics of Plesk-to-Plesk transfers, pre-migration network prerequisites, step-by-step GUI and CLI migration workflows, and zero-downtime DNS cutover strategies. For modern production environments, provisioning workloads on managed Plesk VPS server hosting with automated migrations provides dedicated vCPU allocations, ultra-fast NVMe storage, and complete root administrative access.
Pre-Migration Checklist: Network and Service Prerequisites
Before launching the Plesk Migrator daemon, verify that both the source server (where your websites currently live) and the destination server meet these essential networking and software prerequisites:
- Direct SSH Root Access (Port 22): The destination Plesk server must be able to establish an outbound TCP connection to the source server on port 22 (or your custom SSH port). Ensure hardware firewalls and cloud security groups permit traffic between both server IP addresses.
- Matching Software Versions: Verify that the destination server has matching or newer versions of PHP runtimes (e.g., PHP 8.1, 8.2, 8.3) and database servers (MariaDB 10.6+ or MySQL 8.0) installed. You cannot migrate a MySQL 8.0 database to an older MariaDB 10.3 server without syntax errors.
- Plesk Version Compatibility: Plesk Migrator supports migrations from Plesk 8.6+ up to modern Plesk Obsidian. Ensure the destination server is running the latest stable release of Plesk Obsidian.
- Available Disk Space: The destination server must possess sufficient free storage space to accommodate all files, databases, and emails, plus an additional 20% free buffer for temporary decompression archives.
Migrating to a modern managed Plesk VPS server hosting with automated migrations environment guarantees that all required PHP extensions, Nginx reverse proxy modules, and SSL certbot utilities are pre-installed and tuned for migration.
Migration Method Comparison Matrix
Depending on your technical expertise and server access levels, choose between three primary migration pathways:
| Migration Pathway | Automation Level | Downtime Risk | Technical Complexity | Recommended For |
|---|---|---|---|---|
| Plesk Migrator GUI Extension | 100% Automated | Zero Downtime (with sync) | Low (Visual interface) | Agencies, multiple customer accounts, full server transfers |
| Plesk Migrator CLI Tool | High (Scriptable) | Zero Downtime | Medium (Shell commands) | Sysadmins executing large 100GB+ multi-tenant servers |
| Plesk Backup & Restore | Semi-Automated | Low | Low | Single site migrations where SSH root access is restricted |
When migrating large enterprise e-commerce portals or high-traffic database clusters, upgrading to configuring automated off-site backups in Plesk Obsidian ensures unconstrained NVMe disk throughput and dedicated bandwidth throughout the migration process.
Step-by-Step Runbook: Executing the Migration via Plesk Migrator
Follow this production sequence on your destination Plesk server to execute an automated website migration:
Step 1: Install the Plesk Migrator Extension
Log in to your destination Plesk control panel as admin. In the left navigation sidebar, navigate to Extensions, search for Plesk Migrator, and click Get It Free. Alternatively, install it via the SSH command line:
# Install Plesk Migrator component via the Plesk Installer CLI
plesk installer add --components pmm
Step 2: Initialize Migration Session
In the destination Plesk panel, navigate to Server Management → Extensions → Plesk Migrator → Start a New Migration. Enter the connection parameters for the source server:
- Panel Type: Select
Plesk. - Source Host / IP: Enter the public IPv4 address of the source server.
- SSH Port: Default
22(or your custom port). - Login: Enter
root. - Authentication Method: Select Password or SSH Private Key.
- Temporary Directory: Keep default
/root/plesk_migrator.
Click Prepare Migration. Plesk connects to the source server, deploys temporary collection scripts, and generates an inventory of all customer subscriptions, service plans, databases, and mail accounts. For comprehensive implementation details and operational workflows, review our guide on configuring automated off-site backups in Plesk Obsidian.
Step 3: Select Subscriptions and Perform Initial Transfer
Select the specific domains or subscriptions you wish to migrate. Ensure Migrate mail messages and Migrate web content are checked. Click Migrate. Plesk will stream all virtual host files, database dumps, and mail directories to the destination server.
Zero-Downtime DNS Cutover Strategy
To switch live traffic to the new server without dropping active shopping carts or email messages, execute this disciplined DNS cutover sequence:
- 1. Pre-Testing via Local Hosts File: Before updating public DNS records, test the migrated site on your local computer by mapping the domain to the new server IP in
C:\Windows\System32\drivers\etc\hosts(Windows) or/etc/hosts(macOS/Linux). Test logins, database forms, and SSL certificates thoroughly. - 2. Lower DNS TTL (Time-To-Live): 48 hours before migration, reduce the TTL of your domain’s A records to 300 seconds (5 minutes). This ensures global ISP resolvers purge old cached IP addresses quickly during cutover.
- 3. Execute Differential Re-Sync: Right before changing DNS records, click Re-sync in Plesk Migrator. This fast delta sync transfers only new files, modified database records, and unread emails generated on the source server while you were testing.
- 4. Update DNS A Records: Update your domain’s public A records at your DNS registrar (e.g., Cloudflare, Route53, Namecheap) to point to the destination Plesk server IP. Within 5 minutes, global web traffic will transition seamlessly to the new server.
Once your migration is complete, apply our comparing Plesk vs cPanel WHM server administration workflows checklist to secure SSH keys, enable Fail2ban, and audit Plesk firewall boundaries.
Database & Virtual Host Post-Migration Auditing
Once Plesk Migrator completes data transmission, systems administrators must conduct a rigorous post-migration audit before re-pointing public DNS nameservers. Incomplete transfers frequently stem from minor environment mismatches: To strengthen overall system reliability and security, explore our technical tutorial on comparing Plesk vs cPanel WHM server administration workflows.
- Database Character Collation Checks: Ensure MariaDB/MySQL character sets match between servers. If a source database utilizes
utf8mb4_unicode_520_ciand the destination runs an older database daemon, character encoding corruptions will occur. Always standardize on modern MariaDB 10.6+ or MySQL 8.0 on both hosts. - Custom Web Server Directives: In the destination domain panel, inspect Apache & Nginx Settings to verify that custom rewrite rules, proxy timeouts, and client maximum body size directives (
client_max_body_size 128M;) have transferred accurately. - Cron Job & Scheduled Task Verification: Navigate to Scheduled Tasks (Cron) in the migrated subscription. Verify that absolute paths to interpreter binaries (e.g.,
/opt/plesk/php/8.3/bin/php) match the paths available on the destination operating system.
Mailbox Synchronization and MX Record Cutover
Email migrations require special care to prevent message loss. During large agency transfers, configure IMAP synchronization tools or run a secondary differential mail sync in Plesk Migrator after changing DNS MX records. Instruct end users to update their email client server hostnames (e.g., in Outlook or Apple Mail) to the new destination server hostname once DNS propagation finishes.
For businesses seeking a stable, easy-to-manage web hosting foundation with cPanel or DirectAdmin control, choosing reliable Linux web hosting guarantees high uptime reliability and automated backups.
Conclusion: Seamless Zero-Downtime Plesk Server Migrations
Migrating production websites between Plesk servers does not require hours of dreaded downtime or tedious manual database exports. Utilizing the native Plesk Migrator extension automates user accounts, document roots, SSL certificates, and email mailboxes with absolute consistency.
Frequently Asked Questions
Will Plesk Migrator alter or delete files on the source server?
No. Plesk Migrator operates in read-only mode on the source server. It reads configuration files, generates database backups, and copies content without modifying or deleting existing source data.
Are SSL/TLS certificates transferred during migration?
Yes. Commercial SSL certificates and Let’s Encrypt certificates are automatically transferred and re-bound to the migrated domains. However, once DNS points to the new server, re-issue Let’s Encrypt certificates to ensure automated renewal scripts execute from the new host.
What happens if the source and destination servers have different PHP versions?
If the destination server lacks the specific PHP version used by a source domain, Plesk Migrator will assign the closest available PHP handler and generate a pre-migration warning. To avoid syntax breaks, install matching legacy PHP versions on the destination before migrating.
Can I migrate from Plesk on Windows to Plesk on Linux?
Cross-platform migration (Windows to Linux or vice-versa) is not supported by Plesk Migrator due to fundamental differences in file systems, ASP.NET runtimes, and IIS vs. Apache/Nginx web servers. Cross-platform moves require manual data migration.
How do I handle email messages sent to the old server during DNS propagation?
After updating public DNS records, run a final differential re-sync in Plesk Migrator 24 hours later. This retrieves any straggling email messages received by the source server during global DNS propagation.