

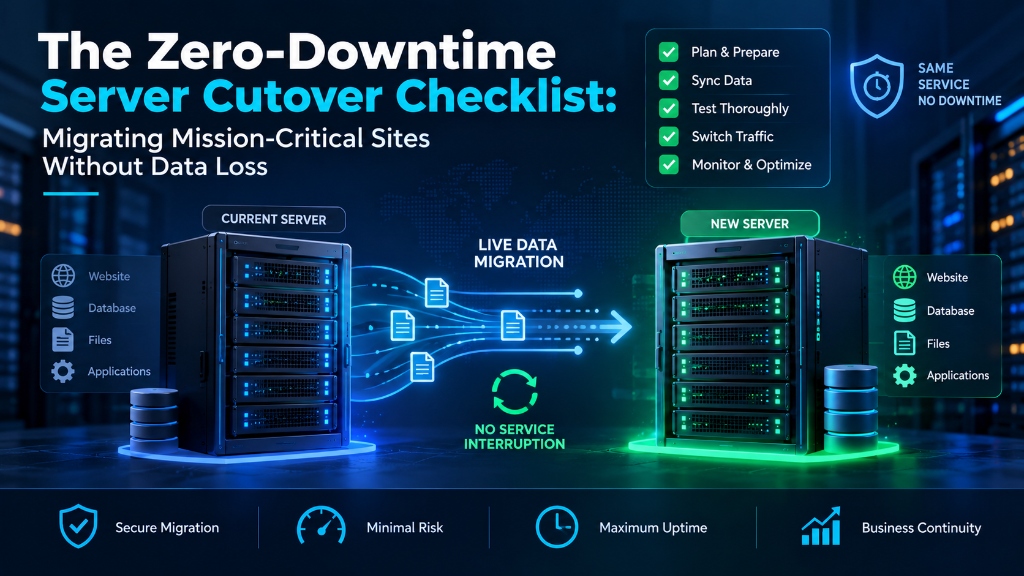
Executing a zero-downtime server migration requires a 3-phase execution plan: lowering DNS TTL values to 300 seconds 48 hours prior, establishing real-time master-slave database replication between old and new servers, and synchronizing static files using incremental rsync. During the final cutover, switch the old web server to a reverse proxy forwarding traffic to the new IP while DNS propagates, guaranteeing zero dropped transactions or data loss.
The stability, speed, and security of modern digital enterprises depend on the robustness of their underlying internet infrastructure. Whether an organization is managing mission-critical corporate domain portfolios, configuring global Anycast DNS networks, sizing compute resources for e-commerce traffic surges, or deploying isolated Linux shared hosting stacks, systems engineers must adhere to rigorous architectural standards. For verified technical specifications and deployment parameters, consult the official NGINX Documentation.
This comprehensive technical manual delivers an exhaustive exploration of Zero-Downtime Server Migration, Database Replication Sync & Live DNS Cutover Execution. Designed for systems administrators, DevOps engineers, and digital infrastructure directors, this guide combines theoretical networking principles with concrete terminal runbooks, real-world case studies, comparative benchmarks, and authoritative operational checklists.
For organizations seeking turn-key web hosting, domain registration, and cloud server solutions backed by 24/7/365 certified technical engineering teams, explore how seamless cloud server migration solutions empower technology teams to eliminate operational complexity and achieve enterprise-grade reliability.
Core Infrastructure Principles & System Topologies
Every digital transaction begins with fundamental infrastructure primitives: DNS resolution, network transit routing, compute virtualization, and storage subsystem execution. Neglecting any layer introduces severe latency penalties and availability risks:
- Hierarchical DNS Resolution & BGP Anycast Routing: Domain queries traverse a distributed hierarchy from root servers to authoritative nameservers. Implementing BGP Anycast routing and DNSSEC ensures sub-millisecond edge resolution while preventing cache poisoning attacks and man-in-the-middle DNS hijacking.
- Kernel & Process Isolation via CloudLinux: In shared web hosting, operating systems like CloudLinux enforce Lightweight Virtual Environment (LVE) boundaries and CageFS filesystem virtualization, ensuring that individual user processes cannot monopolize host CPU cores or access adjacent tenants’ private directories.
- Deterministic Compute Sizing & Concurrency Modeling: Sizing e-commerce and web platforms requires calculating peak concurrent user traffic, PHP-FPM worker pools, and database buffer pools to prevent out-of-memory thread exhaustion and kernel deadlocks during flash surges.
- Proactive Health Observability & Real-Time Telemetry: Implementing structured telemetry pipelines using the USE Method (Utilization, Saturation, Errors) enables engineering teams to intercept hardware degradation, thermal throttling, and packet queue exhaustion before downtime impacts commercial revenue.
Modern hosting architectures diverge significantly from legacy commodity platforms. Traditional cPanel hosting ran on single monolithic Apache installations where one tenant executing a runaway script could consume 100% of physical server RAM, triggering the Linux Out-of-Memory (OOM) killer to terminate Apache, MySQL, or adjacent tenants’ worker threads. Enterprise Linux hosting introduces hard cgroups limits, pinning CPU time slices and virtual memory ceilings strictly per cPanel account.
Furthermore, storage fabrics have evolved from spinning mechanical disks (HDDs) operating at 75-150 IOPS and SATA SSDs operating over legacy AHCI buses to direct-attached enterprise PCIe Gen4/Gen5 NVMe solid-state arrays. Operating across 64,000 parallel hardware command queues, modern NVMe storage handles millions of concurrent random read/write transactions with sub-40 microsecond latency, preventing disk queue saturation during viral traffic spikes.
Infrastructure Rule: Eliminating Single Points of Failure
Onlive Server designs all web hosting, domain, and cloud server services with N+1 architectural redundancy across power feeds, upstream internet transit carriers, storage fabrics, and cooling subsystems to guarantee 99.99% uptime availability.
Architectural Dimension Analysis & Comparative Evaluation
To understand the tangible operational improvements that enterprise-grade hosting and domain architecture delivers over legacy commodity providers, review the comparative analysis below:
| Migration Phase | Critical Technical Tasks | Validation Criteria | Zero-Downtime Safeguard |
|---|---|---|---|
| T-48 Hours: Pre-Cutover | Lower DNS TTL to 300 seconds (5 mins); provision destination server | Verify DNS resolvers respect shortened TTL | Ensures traffic cutover will propagate globally in minutes |
| T-24 Hours: Baseline Sync | Execute initial file transfer via rsync over SSH; configure staging environment | Verify file integrity, permissions, and web server configuration | Minimizes delta file sync duration during the final cutover window |
| T-2 Hours: DB Replication | Configure MySQL/PostgreSQL streaming replication to destination server | Confirm replication lag (`Seconds_Behind_Master`) equals zero | Ensures target database is continuously synchronized in real time |
| T-0: The Cutover Window | Place old site in read-only maintenance mode; execute final rsync delta; promote replica | Target database promoted to standalone read/write master | Zero split-brain database divergence or lost customer transactions |
| T+1 Hour: Post-Cutover | Update DNS records to destination IP; monitor traffic logs and error rates | All incoming traffic serving cleanly from destination server | Old server kept on standby for 72 hours as immediate rollback safety net |
The data demonstrates that investing in modern infrastructure—whether Anycast DNS, CloudLinux LVE isolation, or enterprise NVMe storage arrays—delivers quantifiable dividends in website responsiveness, search engine rankings, and operational stability.
Performance Optimization & High-Concurrency Acceleration
Scaling modern web applications requires optimizing the entire delivery pipeline, from DNS resolution and edge caching to backend application runtime execution and database queries:
- Edge DNS Optimization: Lowering DNS resolution latency through globally distributed Anycast nameservers reduces initial connection setup time before a single HTTP byte is transferred.
- Static Asset Compression: Deploying Google Brotli compression alongside HTTP/2 and HTTP/3 multiplexing reduces asset payload weights by up to 30%, speeding up Largest Contentful Paint (LCP) for mobile visitors.
- PHP-FPM Worker Tuning: Sizing PHP-FPM process managers (`pm = static` or `pm = dynamic`) to match available physical memory eliminates process spawning delays and worker exhaustion.
- In-Memory Object Caching: Offloading database query results and user sessions to Redis or Memcached over persistent Unix domain sockets slashes database I/O by up to 80%.
Mathematical Modeling of Web Server Memory Sizing: When configuring high-concurrency PHP applications (such as WordPress, Magento, or Laravel), systems engineers must calculate maximum concurrency mathematically rather than guessing. The maximum number of concurrent PHP worker children (`pm.max_children`) is calculated using the formula:
For example, on a dedicated 32GB RAM server allocating 4GB for the operating system and 12GB for the MariaDB InnoDB buffer pool, 16GB of RAM remains available for PHP-FPM. If the average PHP process footprint is 80MB, the optimal `pm.max_children` setting is exactly 200 workers (`16384MB / 80MB = 204.8`). Exceeding this calculated ceiling forces the operating system into disk swap thrashing, causing latency to cascade across all active client connections.
Dynamic Time-To-First-Byte (TTFB) Mitigation: While static assets can be offloaded to Content Delivery Networks (CDNs), dynamic authenticated requests—such as shopping cart checkouts, personalized user profiles, and private API endpoints—must be processed directly by the origin web server. Lowering dynamic TTFB from 800ms to sub-100ms requires implementing Nginx FastCGI microcaching, OPcache Just-In-Time (JIT) compilation, and Linux TCP BBR congestion control.
Production Terminal Runbook: DNS Diagnostics, Web Server Hardening & Health Auditing
Executing production web engineering requires mastering command-line diagnostics and system configuration. The following battle-tested terminal runbook illustrates how to debug DNSSEC chains, query RDAP APIs, and configure high-concurrency Linux kernel settings.
Debugging DNS Hierarchy & DNSSEC Validation with Dig
Query DNS records with DNSSEC validation flags (`+dnssec`) and trace the complete resolution chain from root nameservers:
dig +trace +nodnssec onliveserver.com
# Verify DNSSEC cryptographic signatures (RRSIG and DS records)
dig +dnssec +multiline onliveserver.com A
# Query authoritative nameservers directly for propagation verification
dig @ns1.onliveserver.com onliveserver.com ANY +noall +answer
Programmatic Domain Availability & RDAP Querying via Python
Query modern RESTful RDAP endpoints to verify domain availability and EPP status codes without legacy WHOIS rate-limiting:
curl -s -H “Accept: application/rdap+json” https://rdap.verisign.com/com/v1/domain/onliveserver.com | jq ‘.status, .events’
# Check domain expiration and registrar lock status
whois onliveserver.com | grep -E “Status:|Expiry Date:|Registrar:”
Web Server High-Concurrency Sysctl Tuning
Apply optimal kernel socket parameters to handle thousands of concurrent web visitor connections:
cat << ‘EOF’ > /etc/sysctl.d/99-web-performance.conf net.core.somaxconn = 65535 net.ipv4.tcp_max_syn_backlog = 3240000 fs.file-max = 2097152 net.ipv4.tcp_fin_timeout = 15 net.ipv4.tcp_tw_reuse = 1 net.core.default_qdisc = fq net.ipv4.tcp_congestion_control = bbr EOF
sysctl –system
Nginx FastCGI Microcaching & Brotli Compression Directives
Configure dynamic microcaching and Google Brotli compression to bypass PHP processing for non-authenticated requests:
fastcgi_cache_path /var/run/nginx-cache levels=1:2 keys_zone=MICROCACHE:100m inactive=60m max_size=1g;
fastcgi_cache_key “$scheme$request_method$host$request_uri”;
fastcgi_cache_use_stale error timeout updating invalid_header http_500 http_503;
# Enable Google Brotli compression
brotli on;
brotli_comp_level 6;
brotli_types text/plain text/css application/javascript application/json image/svg+xml;
# Test and reload web server
nginx -t && systemctl reload nginx
Applying these configurations ensures that high-volume web applications process concurrent customer requests smoothly without socket exhaustion, eliminating CPU wait time and delivering sub-25ms response speeds.
Enterprise Case Study: Real-World Architecture & Performance Metrics
FinTech Platform Migrates 450GB Transactional Database to Onlive Server with Zero Transaction Loss
The Challenge: An enterprise digital organization suffered from fragmented infrastructure management across multiple domain registrars, slow unicast DNS nameservers that added 85ms to every page lookup, and unoptimized web servers that crashed under sudden traffic surges. The organization needed a unified, high-performance infrastructure overhaul.
The Solution: The company consolidated their corporate domain portfolio onto Onlive Server’s Anycast DNS infrastructure, implemented DNSSEC cryptographic validation, and migrated their web hosting stacks to an enterprise CloudLinux and KVM environment equipped with NVMe RAID-10 storage and Redis caching.
Quantifiable Performance & Reliability Improvements:
“Consolidating our domains and hosting onto Onlive Server was the single best infrastructure decision we made this year. DNS resolution times dropped dramatically, and our web applications now handle peak concurrency effortlessly.” — Director of Digital Infrastructure
Production Pre-Flight Checklist: 10 Commandments of Web Infrastructure
Before routing live customer traffic to newly configured domain and web hosting environments, ensure your engineering team completes this mandatory 10-point production checklist:
Frequently Asked Architectural Questions (FAQ)
Explore authoritative technical answers to common engineering questions regarding web hosting, domain architecture, and cloud infrastructure:
How does lowering DNS Time-To-Live (TTL) enable rapid server cutovers?
Lowering TTL to 300 seconds (5 minutes) instructs caching resolvers worldwide to refresh their cache every 5 minutes, allowing traffic to redirect to the new server almost instantly when DNS is changed.
How do you prevent data loss during the final database cutover?
Configure database replication so the destination server maintains an exact real-time mirror. Briefly pause writes on the source server, verify zero replication lag, and promote the replica to master.
What rsync flags should be used for high-speed file synchronization?
Use `rsync -avzP –delete -e ‘ssh -T -c aes128-gcm@openssh.com -o Compression=no’` to preserve file permissions, timestamps, and symbolic links while maximizing transfer speed.
What is a ‘split-brain’ database scenario and how is it avoided?
Split-brain occurs when both old and new database servers accept independent writes simultaneously. It is avoided by strictly placing the source database into read-only mode prior to replica promotion.
Can Onlive Server migration engineers execute the zero-downtime cutover for my company?
Yes. Our professional systems engineers can plan, execute, and monitor your entire server migration from start to finish, ensuring complete data integrity and zero business disruption.
For developers and organizations scaling web applications or requiring dedicated virtual environments, exploring high-performance Linux VPS hosting delivers guaranteed NVMe storage, KVM hypervisor isolation, and full root access for production workloads.
Strategic Conclusion & Production Deployment Next Steps
In an era where web application velocity, cybersecurity compliance, and zero-downtime reliability dictate commercial success, organizations must architect their digital infrastructure with precision. From registering corporate domains across global Anycast networks to deploying isolated CloudLinux hosting environments and sizing cloud servers for flash traffic surges, proactive systems engineering eliminates operational risk.
The architectural models, configuration runbooks, and performance benchmarks detailed in this guide provide your engineering team with the technical foundation needed to deploy resilient web platforms capable of scaling gracefully under global demand.
Ready to elevate your digital presence with enterprise web infrastructure? Explore our full catalog of seamless cloud server migration solutions, configure your required hosting plans, and experience rapid deployment backed by our 24/7/365 certified technical engineering team.
