

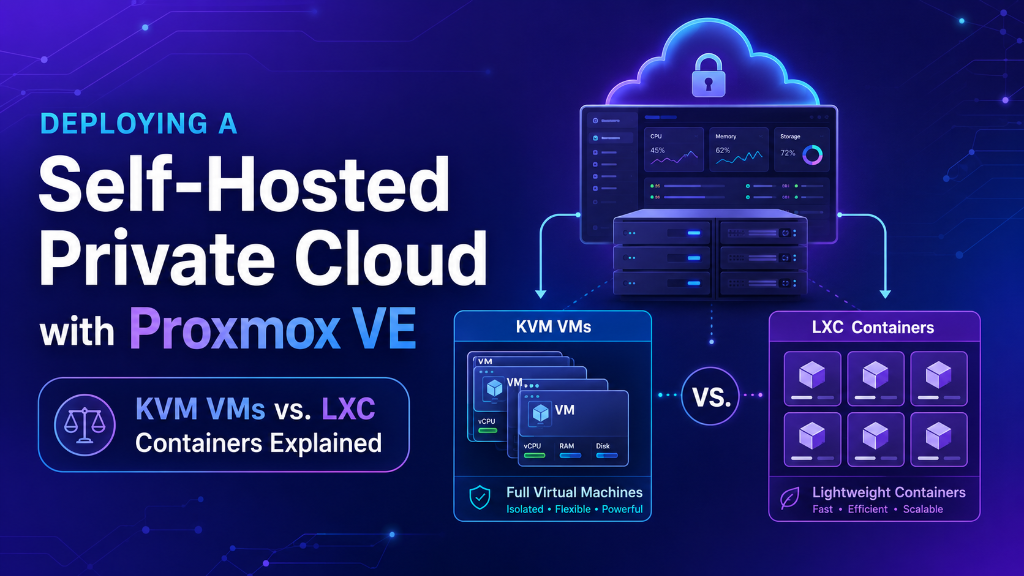
Proxmox VE private cloud management combines Type-1 KVM virtual machines for complete kernel isolation (ideal for Windows, multi-tenant security, and custom OS workloads) with lightweight LXC containers for maximum container density (sub-second boot times and minimal RAM overhead). By integrating ZFS local storage pools, Ceph distributed cluster storage, and Software-Defined Networking (SDN) VXLAN overlays, Proxmox VE delivers an enterprise, license-free private cloud infrastructure on high-performance bare metal and cloud VPS servers.
- Open-Source Enterprise Virtualization: Proxmox Virtual Environment combines Type-1 KVM full virtualization and lightweight Linux Containers (LXC) into a unified platform.
- KVM VMs vs. LXC Containers: KVM delivers total hardware isolation for Windows and Linux multi-tenancy. In contrast, LXC provides a tiny 15MB idle RAM footprint with sub-second boot times.
- Cluster Storage & Live Migration: Built-in support for ZFS and Ceph distributed storage enables live virtual machine migrations without downtime.
- Enterprise Cloud Foundation: Deploying on modern USA cloud VPS solutions ensures dedicated compute allocations, high NVMe IOPS, and complete root control.
- 1. Introduction: The Private Cloud Infrastructure Shift
- 2. Architectural Models: Full KVM VMs vs. Lightweight LXC Containers
- 3. Core Concepts: Hardware Isolation, Ceph Storage & SDN Meshes
- 4. Architectural Performance Matrix: KVM vs. LXC vs. Docker
- 5. Real-World Scenarios: Choosing KVM vs. LXC in Production
- 6. Hypervisor Comparison: Proxmox VE vs. VMware ESXi vs. OpenStack
- 7. Hands-On Implementation: Managing Proxmox VE via CLI
- 8. Frequently Asked Questions (FAQs)
- 9. Strategic Architecture Roadmap for Private Cloud Infrastructure
1. Introduction: The Private Cloud Infrastructure Shift
Public cloud hyperscalers continue to escalate egress bandwidth costs and API fees. Therefore, enterprise technology leaders are actively executing cloud repatriation strategies.
Organizations are turning away from expensive proprietary virtualization suites. Instead, they favor powerful open-source hypervisors that offer enterprise capabilities without recurring licensing fees. Consequently, this shift grants companies complete autonomy over their physical compute stack.
At the forefront of this private cloud movement stands Proxmox Virtual Environment (Proxmox VE). Building an enterprise Proxmox VE private cloud allows IT teams to operate with maximum agility. Specifically, it integrates two virtualization models: full KVM virtual machines and lightweight LXC Linux containers.
Furthermore, Proxmox VE provides granular control over hardware passthrough, CPU core pinning, and memory ballooning. System administrators can optimize resource allocations directly to maximize Linux dedicated server hosting performance. As a result, database engines and web applications receive guaranteed compute cycles without hypervisor contention.
In addition, Proxmox clusters deliver rock-solid Corosync quorum management and automated live failover. Deploying on high-performance USA cloud VPS solutions provides the reliable KVM building blocks needed for mission-critical enterprise workloads.
2. Architectural Models: Full KVM VMs vs. Lightweight LXC Containers
Comparing hardware-level virtualization against operating system containerization highlights how Proxmox VE balances isolation and performance.
KVM Virtual Machines
Full hardware virtualization with dedicated virtual BIOS, kernel, and memory. Runs any OS (Linux, Windows, BSD). Provides an impenetrable security boundary for multi-tenancy.
LXC Linux Containers
Lightweight containerization sharing the host Linux kernel via cgroups and namespaces. Features a 15MB idle RAM footprint, instant sub-second boots, and near-zero overhead.
3. Core Concepts: Hardware Isolation, Ceph Storage & SDN Meshes
Choosing the right virtualization model requires understanding the balance between hardware isolation and execution density. For example, explore our walkthrough on setting up a private cloud using Nextcloud on VPS to deploy containerized collaboration tools.
KVM Virtual Machines: Full Silicon Isolation
KVM leverages hardware virtualization extensions (Intel VT-x and AMD-V) to run guest virtual machines. Each KVM virtual machine functions as an independent computer with its own virtualized processor registers, memory, and independent operating system kernel.
Because KVM virtual machines run their own kernel, they provide an impenetrable security boundary. If a kernel panic strikes guest VM A, it cannot affect guest VM B or the host hypervisor. Furthermore, KVM allows you to run non-Linux operating systems, such as Windows Server and FreeBSD.
LXC Containers: High-Density Lightweight Workloads
Unlike KVM virtual machines, Linux Containers (LXC) do not emulate virtual hardware or run a separate kernel. Instead, LXC relies on kernel control groups (cgroups) to throttle CPU and RAM, along with kernel namespaces to isolate process trees.
Because LXC containers execute directly against the host Linux kernel, there is virtually zero hypervisor overhead. An idle LXC container consumes as little as 15MB of RAM and boots in under 500 milliseconds. Therefore, a single 64GB RAM node can comfortably host hundreds of isolated application containers.
Ceph Distributed Software-Defined Storage Integration
For high-availability clusters, Proxmox VE includes native management for Ceph distributed storage. By pooling local NVMe drives across physical nodes into a unified Ceph RADOS pool, Proxmox delivers self-healing replicated storage. If a host node fails, high-availability daemons automatically restart virtual machines on surviving nodes within seconds.
Software-Defined Networking (SDN) & VXLAN Overlays
Proxmox VE features integrated Software-Defined Networking (SDN). By leveraging VXLAN encapsulation, engineers can establish isolated Layer 2 broadcast domains across physical nodes over standard Layer 3 IP networks. Consequently, this enables seamless private VM communication across cluster nodes without complex physical switch changes.
4. Architectural Performance Matrix: KVM vs. LXC vs. Docker
Review this technical comparison to determine the optimal compute runtime for your private cloud workloads:
| Technical Metric | KVM Virtual Machine | Proxmox LXC Container | Docker / OCI Container |
|---|---|---|---|
| Virtualization Level | Type-1 Hypervisor (Hardware) | OS-Level (cgroups/namespaces) | Application-Level Container |
| Idle Memory Overhead | 150 MB – 512 MB | 10 MB – 25 MB | 5 MB – 15 MB |
| Boot Time | 15 – 35 Seconds | < 1 Second | < 500 Milliseconds |
| Operating System Support | Linux, Windows, BSD, etc. | Linux distributions only | Packaged app images |
| Security Isolation | Hardware Silicon Boundary | Unprivileged User Mapping | Process Isolation Only |
5. Real-World Scenarios: Choosing KVM vs. LXC in Production
Aligning workloads with the proper runtime maximizes both security and infrastructure density:
🏢 Multi-Tenant Client Hosting (KVM)
Hosting agencies deploy independent KVM virtual machines for each client, guaranteeing strict security isolation and dedicated resource quotas.
🚀 High-Density Microservices (LXC)
Engineering teams spin up dozens of lightweight LXC containers for Redis caches, reverse proxies, and Node.js microservices with minimal RAM overhead.
⚙️ Ephemeral CI/CD Build Runners (LXC)
Automated deployment pipelines clone template LXC containers in under 1 second to run test suites, destroying them immediately after execution.
🗄️ High-Performance SQL Databases (KVM)
PostgreSQL and MySQL database servers run on dedicated pinned KVM virtual machines backed by ZFS RAID 10 storage for predictable IOPS throughput.
6. Hypervisor Comparison: Proxmox VE vs. VMware ESXi vs. OpenStack
Evaluating hypervisor options helps clarify licensing and operational overhead across enterprise virtualization platforms:
| Platform Feature | Proxmox VE | VMware ESXi / vSphere | OpenStack |
|---|---|---|---|
| Licensing Model | Open Source (GPLv3) | Expensive per-core subscription | Open Source (Apache 2.0) |
| LXC Container Support | Native Built-in | Requires Tanzu add-on | Via plugins |
| Clustering Setup Complexity | Simple 1-command join | Moderate (vCenter server) | Extremely Complex |
| Integrated Backup Server | Proxmox Backup Server (PBS) | Third-party (Veeam) | Third-party / Freezer |
7. Hands-On Implementation: Managing Proxmox VE via CLI
Execute these production commands in your terminal to audit cluster health, provision LXC containers, and deploy KVM virtual machines. If you are comparing guest operating systems, read our analysis comparing Windows VPS vs Linux VPS operating systems.
Step 1: Check Proxmox Cluster Quorum and Storage Pools
Audit cluster node synchronization and verify storage pool allocations:
pvecm status
pvesm status
Step 2: Provision a High-Density Debian 12 LXC Container via pct
Deploy an unprivileged container with 2 cores, 2GB RAM, and static networking in 5 seconds:
pct create 201 local:vztmpl/debian-12-standard_12.2-1_amd64.tar.zst \
  --cores 2 --memory 2048 --swap 1024 \
  --net0 name=eth0,bridge=vmbr0,ip=10.10.0.50/24,gw=10.10.0.1 \
  --storage local-zfs --rootfs local-zfs:20 --unprivileged 1
pct start 201
Step 3: Provision a Production KVM Virtual Machine with VirtIO Drivers
Create an enterprise virtual machine with SCSI controller and QEMU guest agent:
qm create 101 --name ubuntu-app-server --memory 8192 --cores 4 \
  --scsihw virtio-scsi-pci --scsi0 local-zfs:50,discard=on,ssd=1 \
  --net0 virtio,bridge=vmbr0 --agent 1 --boot order=scsi0
qm start 101
Step 4: Configure Linux Bridge Network Interfaces
Configure the physical uplink and virtual bridge interface in /etc/network/interfaces:
auto vmbr0
iface vmbr0 inet static
    address 10.10.0.1/24
    bridge-ports enp5s0
    bridge-stp off
    bridge-fd 0
Step 5: Execute Client-Side Deduplicated Backup via vzdump
Perform a live snapshot backup of virtual machine 101 to Proxmox Backup Server:
vzdump 101 --storage pbs-remote --mode snapshot --compress zstd
Step 6: Configure SDN VXLAN Overlay Network across Cluster Nodes
Establish cross-node Layer 2 overlay networks in /etc/pve/sdn/zones.cfg:
vxlan: myvxlan
    peers 192.168.1.10,192.168.1.11,192.168.1.12
    ipam pve
Reload SDN changes across the cluster:
pvesdn reload
/etc/modprobe.d/zfs.conf (e.g., options zfs zfs_arc_max=8589934592 for 8GB) to guarantee RAM availability for guest VMs.
8. Frequently Asked Questions (FAQs)
Is Proxmox VE free to use in enterprise production environments?
Can I run Docker containers inside a Proxmox LXC container?
How does live VM migration work in Proxmox VE?
What is the difference between unprivileged and privileged LXC containers?
What storage filesystem is best for Proxmox VE local disks?
9. Strategic Architecture Roadmap for Private Cloud Infrastructure
Building a modern private cloud with Proxmox VE frees your organization from proprietary virtualization licensing fees while delivering granular control over compute, storage, and networking layers. Combining KVM hardware isolation for multi-tenant security with lightweight LXC containers for microservices ensures peak infrastructure density and sub-second scaling.
By integrating Ceph self-healing storage and Software-Defined Networking on high-performance KVM virtual private servers, businesses achieve sovereign, enterprise-grade cloud reliability across global markets.
Conclusion: Driving Business Growth with Enterprise VPS Hosting
Deploying mission-critical applications on high-performance Enterprise VPS Hosting infrastructure provides the dedicated processing power, network speed, and reliability demanded by modern web users.
Whether managing high-traffic e-commerce portals, streaming media, or corporate databases, Onlive Server delivers enterprise-grade hardware, 24/7 technical support, and competitive pricing for global success.
